How to Distribute and Test an iOS App Using TestFlight
This page explains how to distribute an iOS app with TestFlight and conduct testing.
This guide assumes that the iOS app has already been uploaded to App Store Connect.
If you haven't done so yet, please go back to the TestFlight Distribution menu and upload your app first.
Internal Testers vs. External Testers in TestFlight
When testing with TestFlight, there are two options: internal testers and external testers.
Internal testers must be registered as users in App Store Connect, but the app does not require Apple's review before distribution. This is convenient when you want feedback even before development is fully complete.
You can register up to 100 internal testers, and each tester can use up to 30 devices.
External testers do not need to be registered as users in App Store Connect. However, the app must go through Apple's review process and be approved before distribution.
You can invite up to 10,000 external testers using their email addresses or an invitation link.
In this guide, we'll walk through how to distribute your iOS app to internal testers using TestFlight.
Add Testers in App Store Connect via Users and Access
First, add user accounts for internal testers in App Store Connect under Users and Access.
If the users you want to test are already registered, you can skip this section.
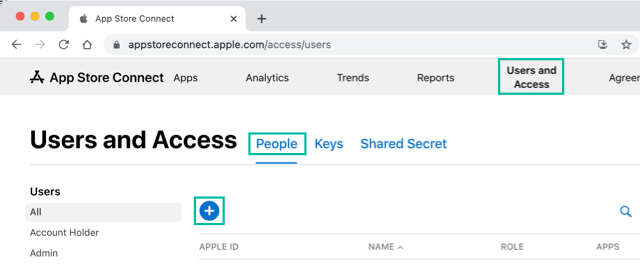
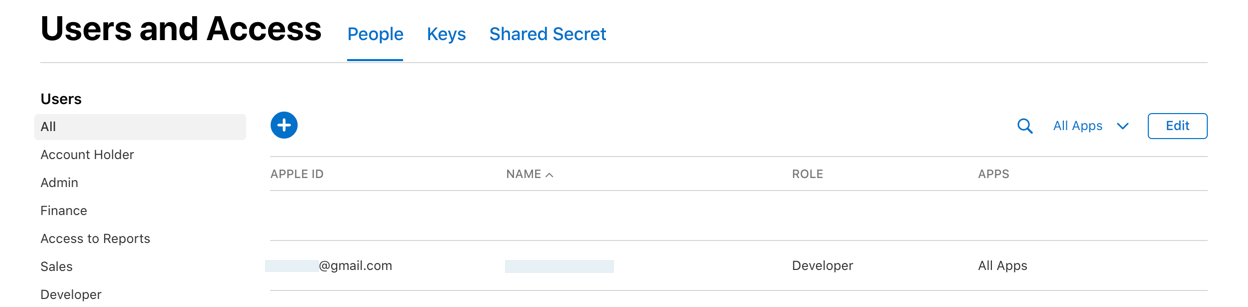
In App Store Connect, go to Users and Access > People and click the + button.
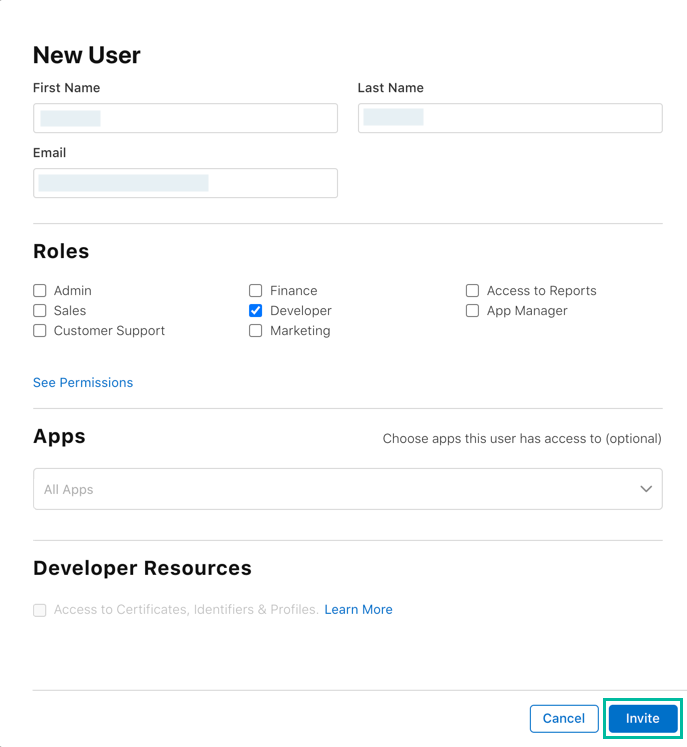
Enter the user information, select a role such as Admin, App Manager, Developer, or Marketing, and click [Invite].
Make sure to use the Apple ID email address of the iOS device you plan to test on.
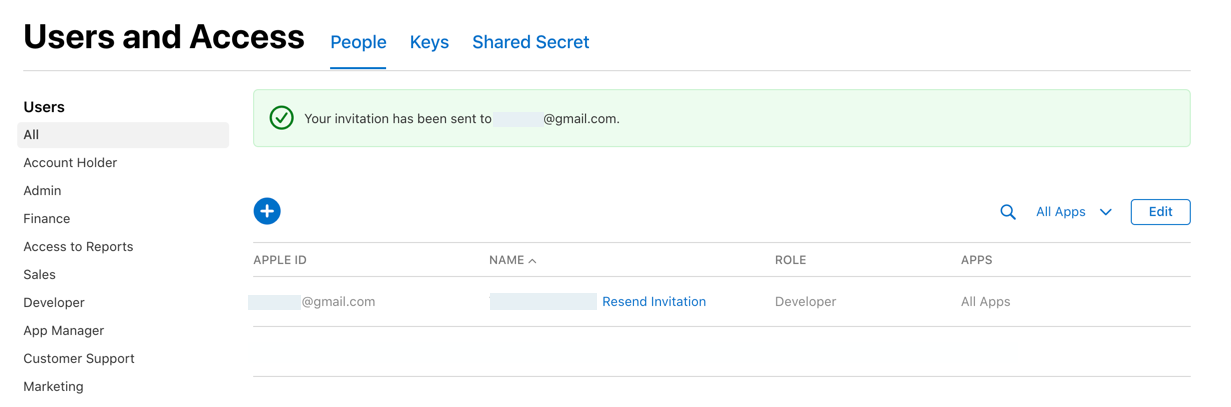
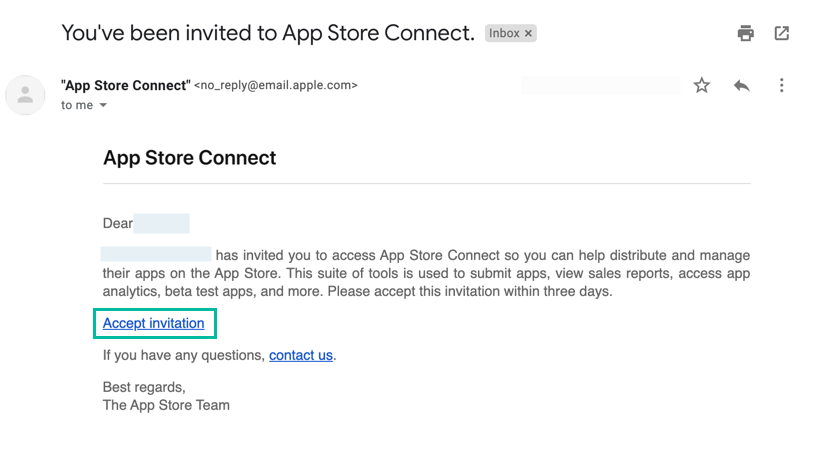
An invitation email from App Store Connect will be sent.
From the invitation link, the user logs in to App Store Connect and completes registration.
Once registered, the user's name will change from light gray to black text.
Register Internal Testers in App Store Connect TestFlight
Next, register internal testers in App Store Connect so they can test the uploaded iOS app with TestFlight.
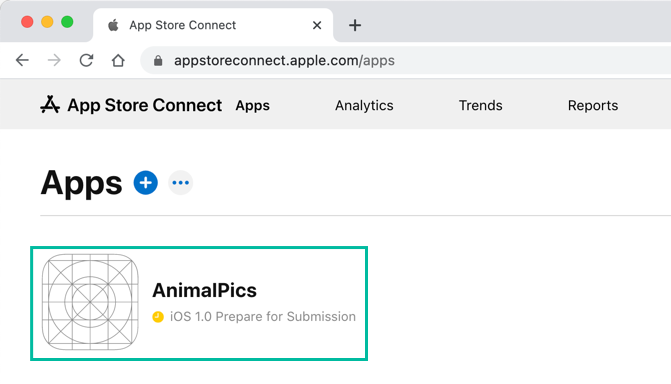
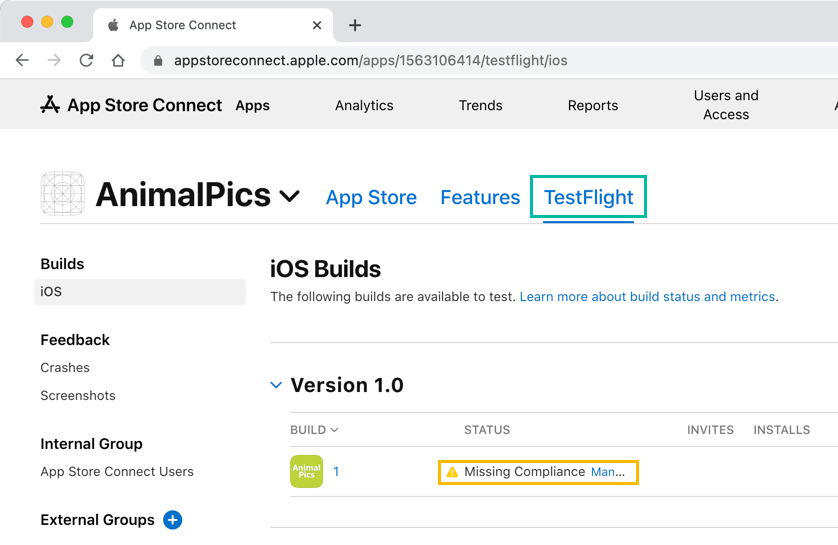
In App Store Connect, go to Apps and select the uploaded app.
Click the TestFlight tab. If a compliance warning appears, click the link and answer the required questions.
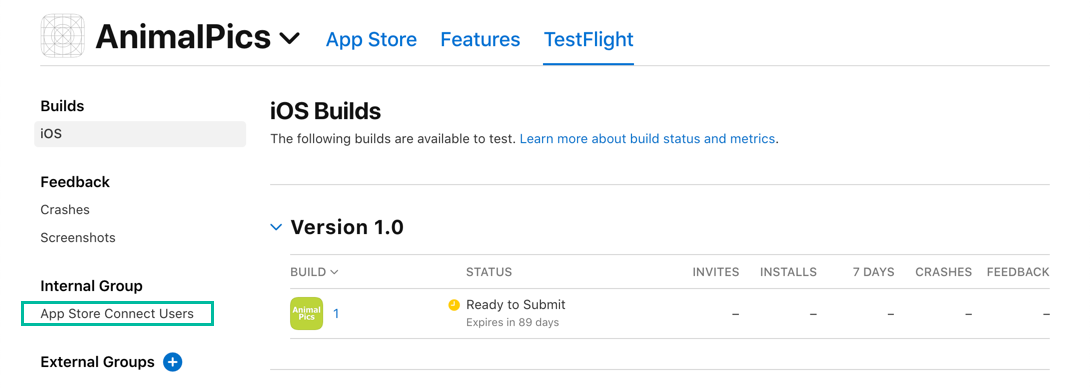
Under Internal Group, click App Store Connect Users.
In the App Store Connect Users screen, click the + button under Testers.
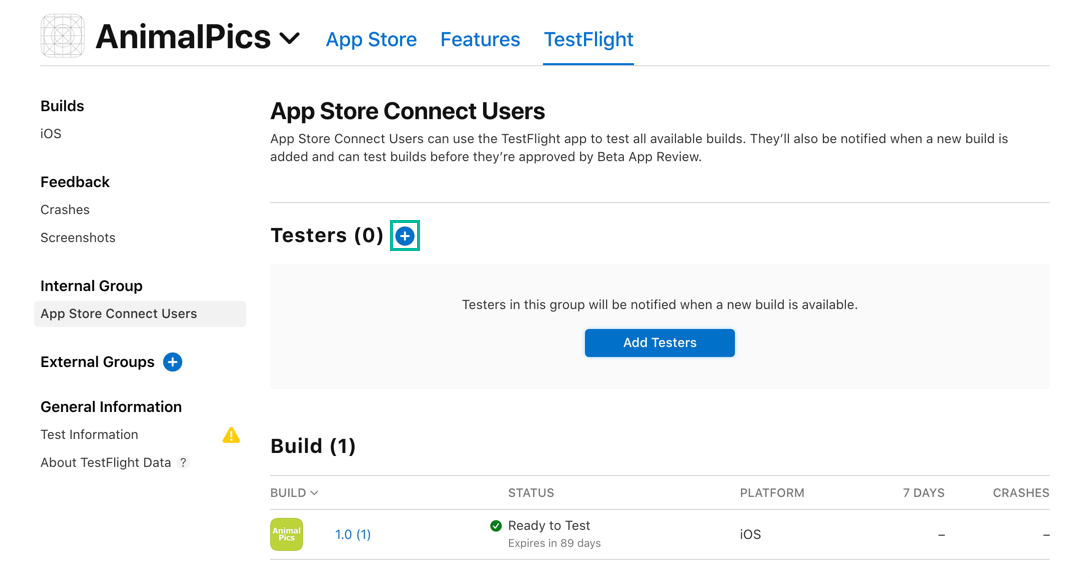
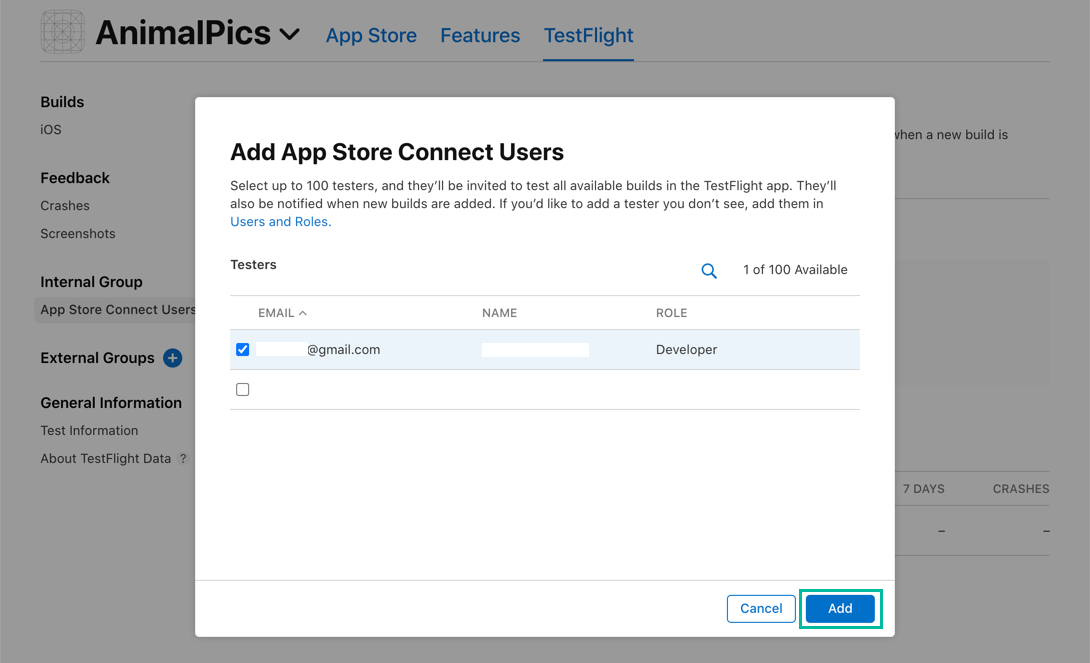
A list of available users will appear. Select the users you want to register as internal testers and click [Add].
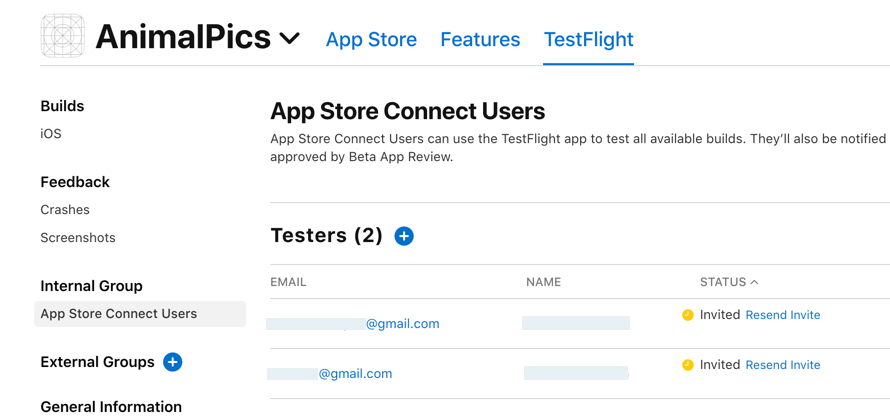
An invitation email will then be sent to the internal testers, allowing them to test the app with TestFlight.
Install and Test the App with TestFlight on iOS Devices
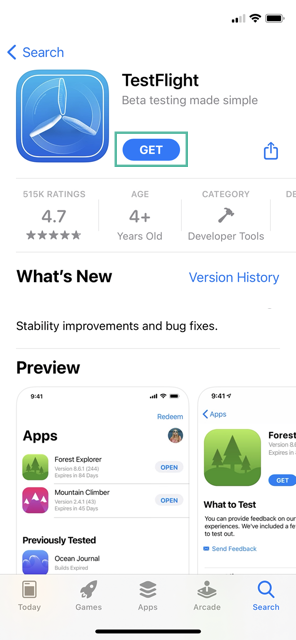
On the iOS device registered with the internal tester's Apple ID, install the TestFlight app from the App Store.
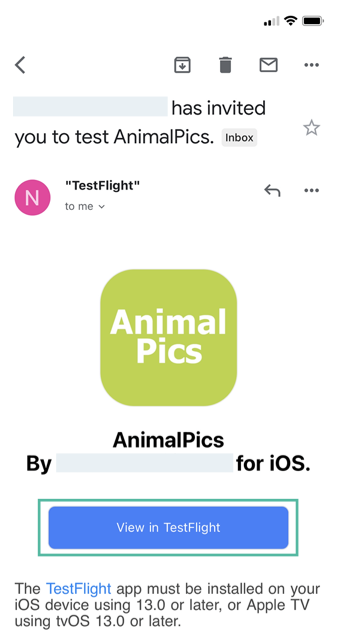
Next, open the invitation email on the iOS device and tap View in TestFlight.
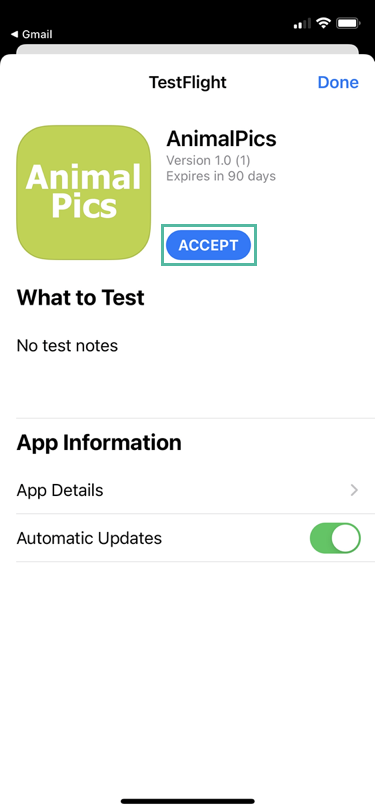
In TestFlight, tap Accept when prompted.
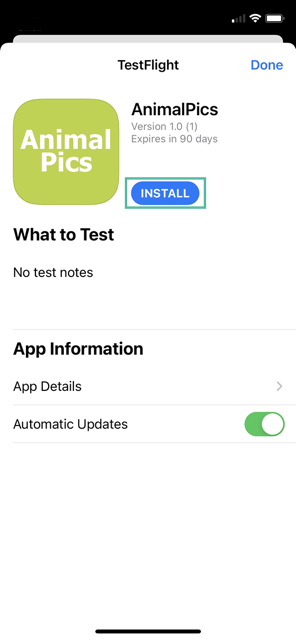
On the next screen, tap Install to install the app.
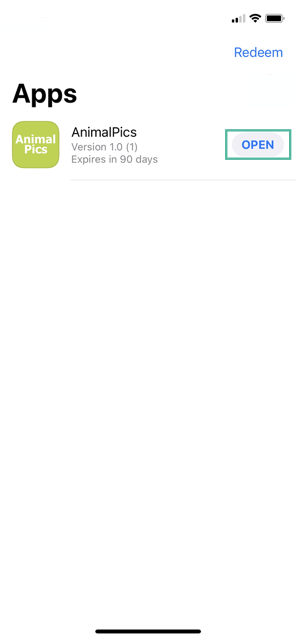
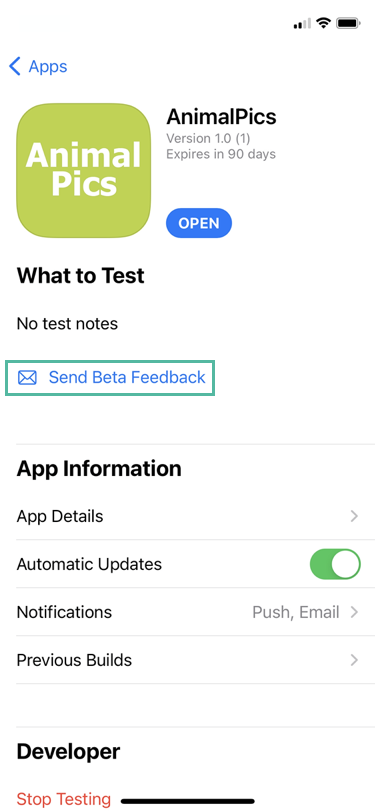
Once installed, the app will appear in the list of apps in TestFlight. Tap Open to launch and test the app.

From the TestFlight app list, tap the app name to open the feedback screen. You can send beta feedback by tapping Send Beta Feedback.
That's it. You've now learned how to distribute an iOS app with TestFlight and test it on iOS devices.