How to Add Padding to UILabel and UITextField (Swift)
In this article, we'll explain how to add padding (margins) to UILabel and UITextField in Swift.
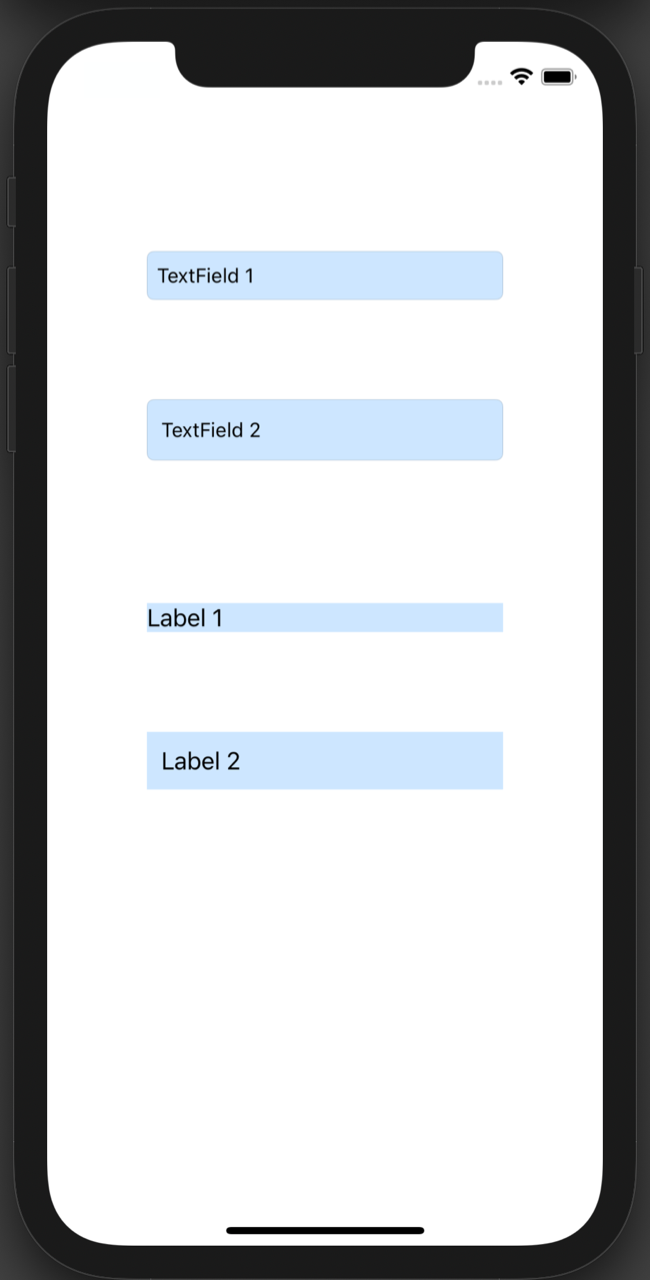
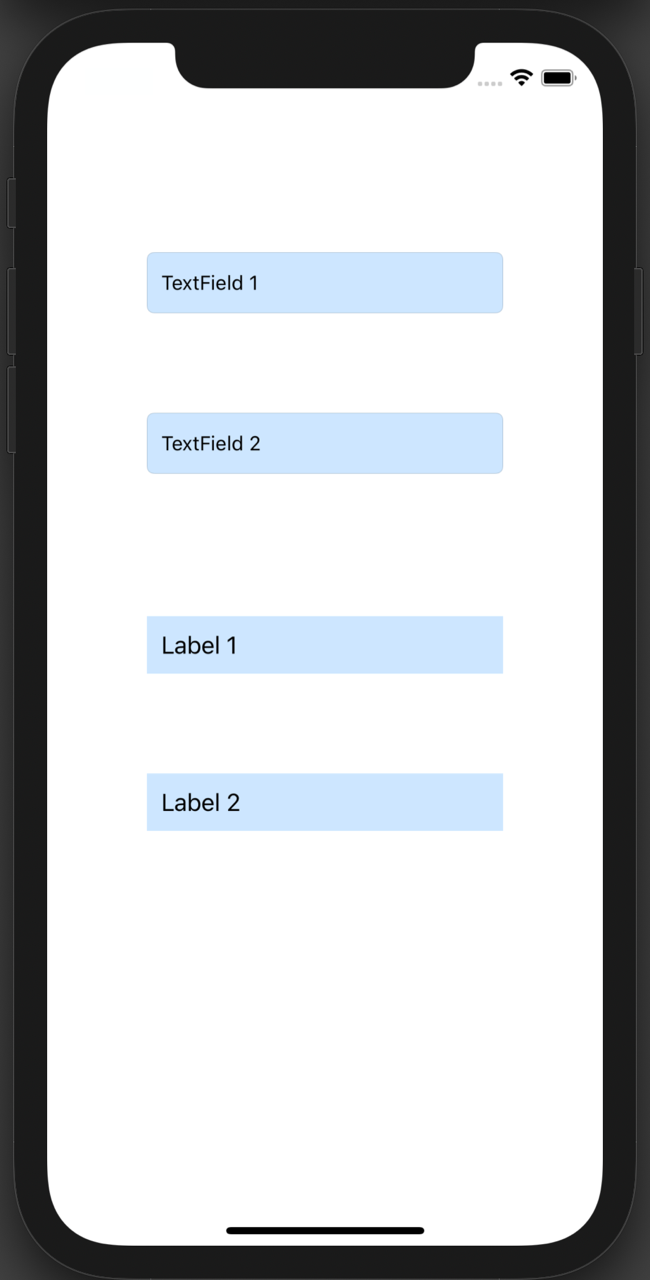
In the screenshot below, TextField 1 and Label 1 use the default padding, while TextField 2 and Label 2 have custom padding applied.
Prepare a Test iOS App
First, let's create a simple iOS app for testing padding in UILabel and UITextField.
Create a new project in Xcode using [iOS] > [App].
On the Main storyboard's View Controller, add two UITextFields and two UILabels.
For visibility, set background colors and set their text to “TextField 1”, “TextField 2”, “Label 1”, and “Label 2”.

How to Add Padding to UITextField
Let's start with adding padding to a UITextField.
There are multiple ways to do this, but here we'll create a custom UITextField subclass.
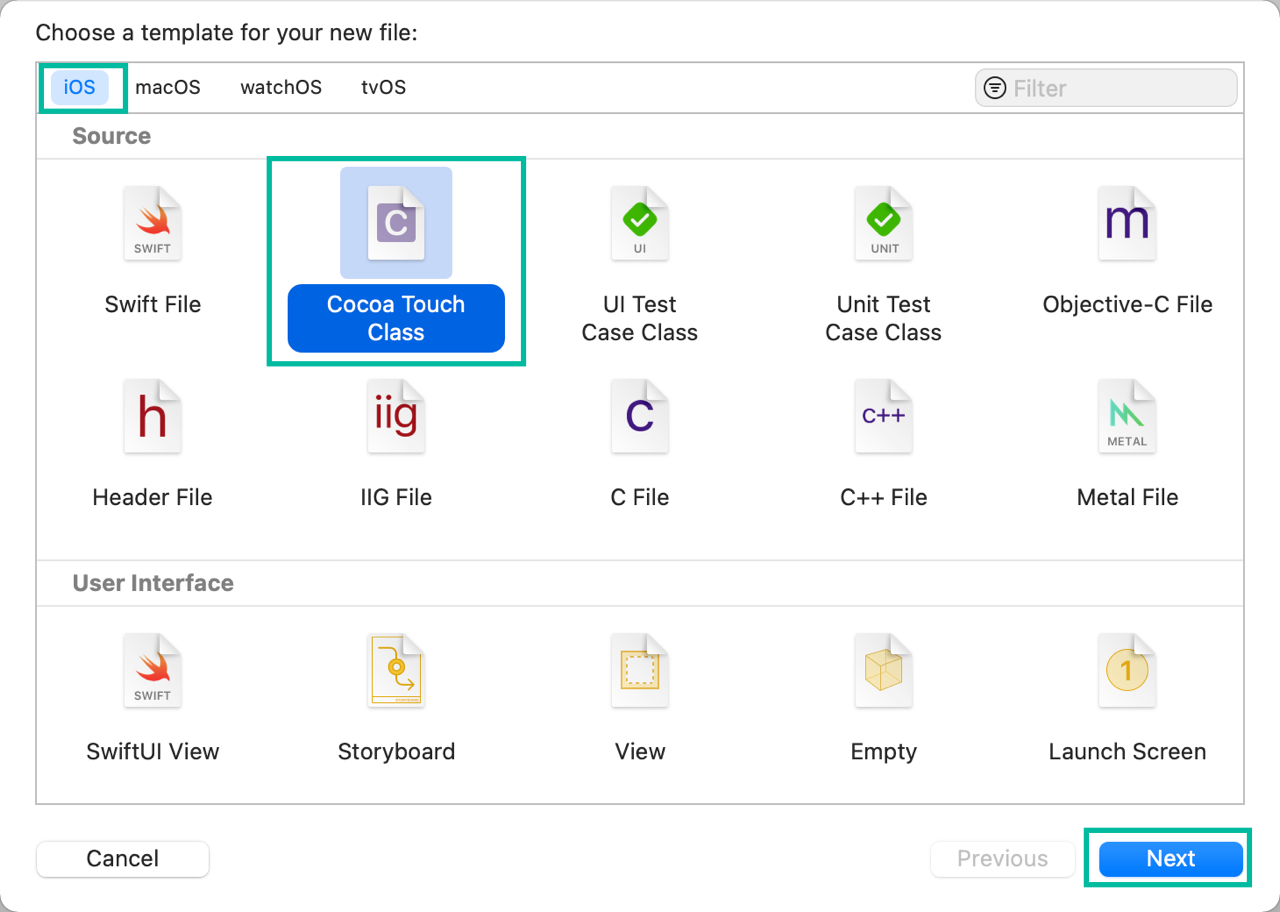
From Xcode's menu, select [File] > [New] > [File from Template...].

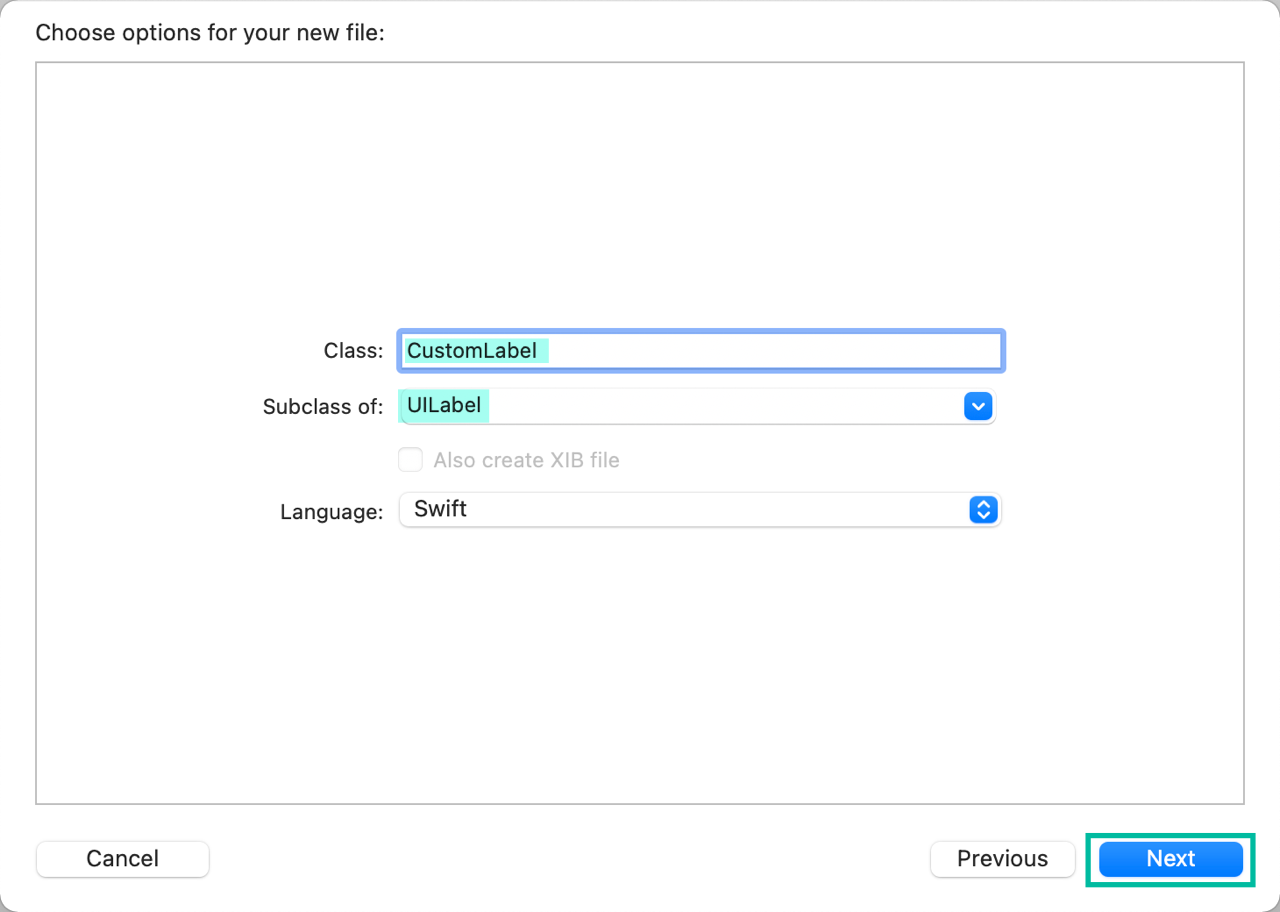
Select [iOS] > [Cocoa Touch Class] and click [Next].
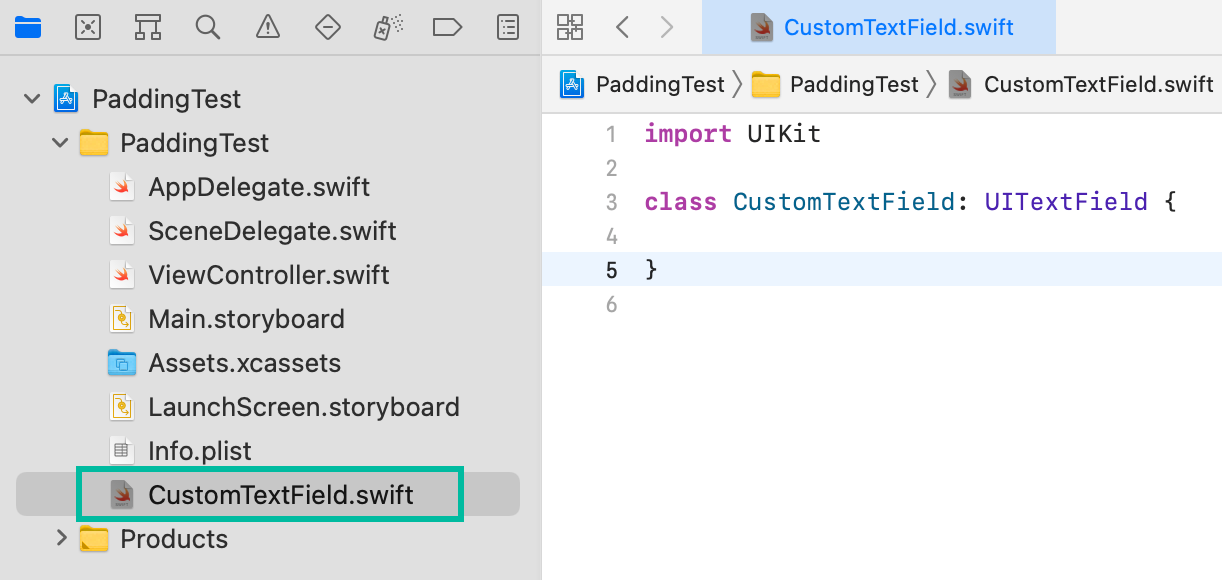
Enter a class name. Here, we'll use CustomTextField. Set “Subclass of” to UITextField, click [Next], and generate the file.

The file CustomTextField.swift is created.
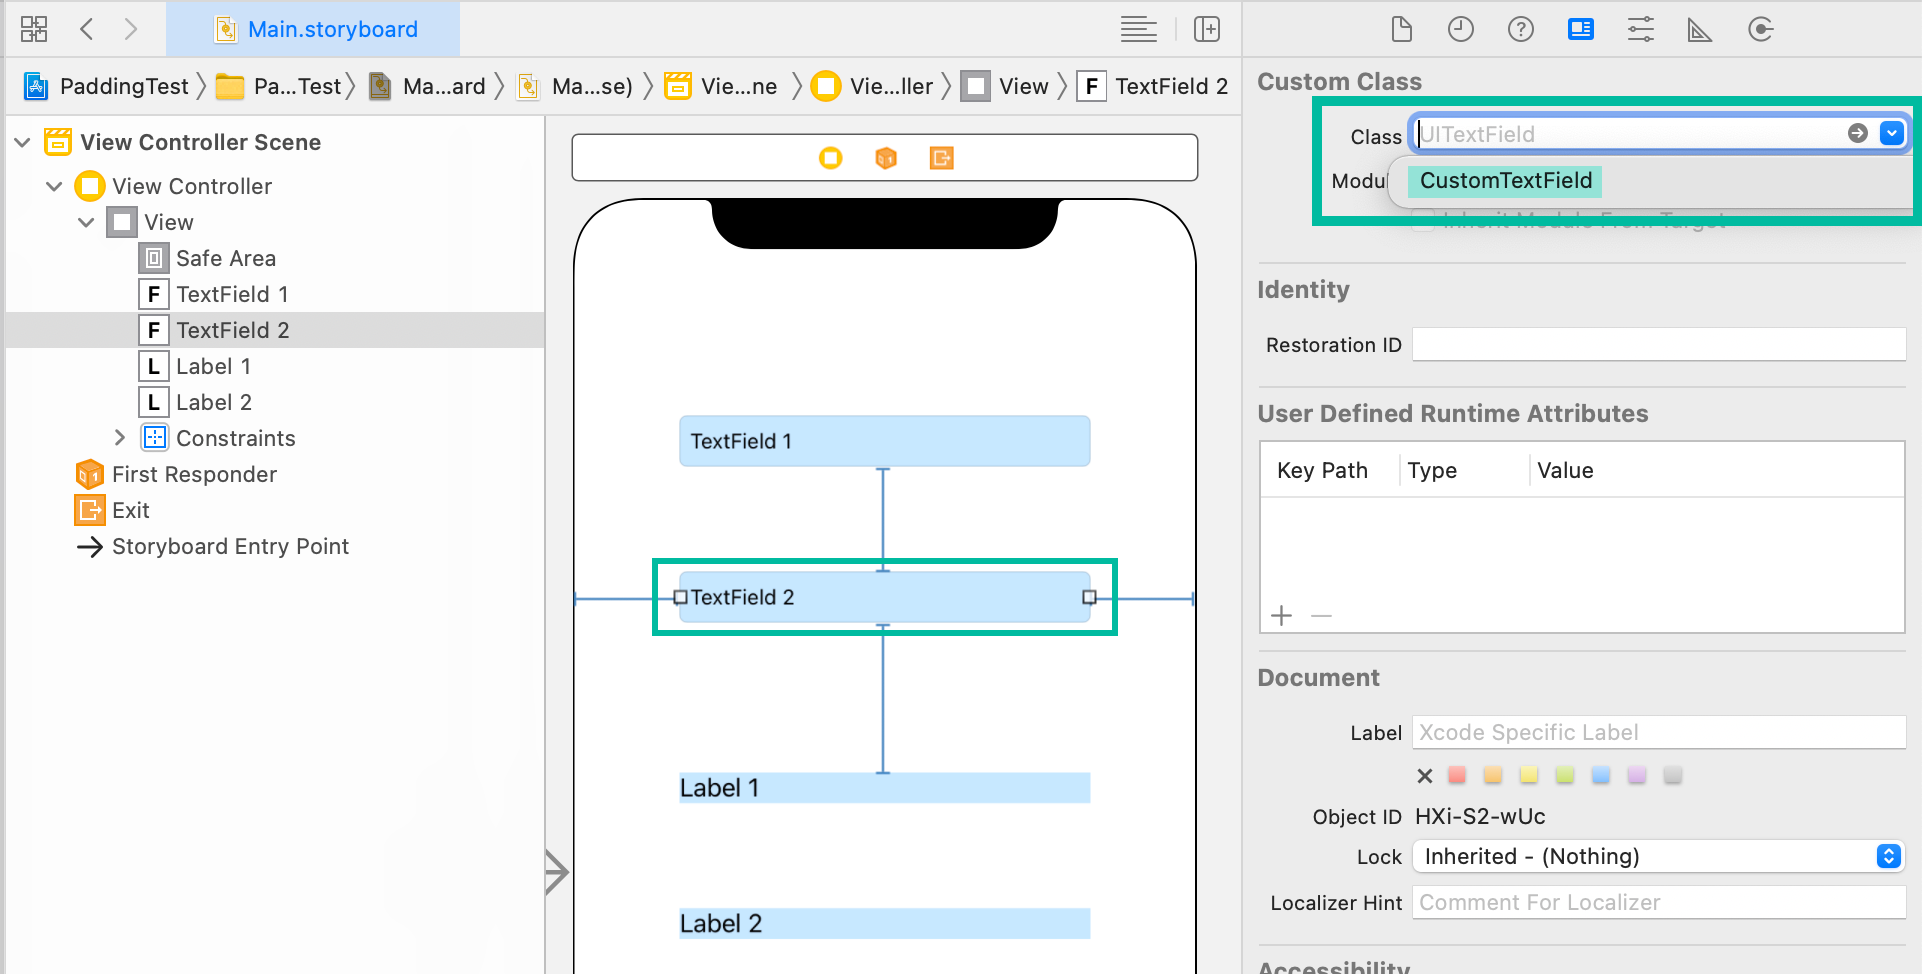
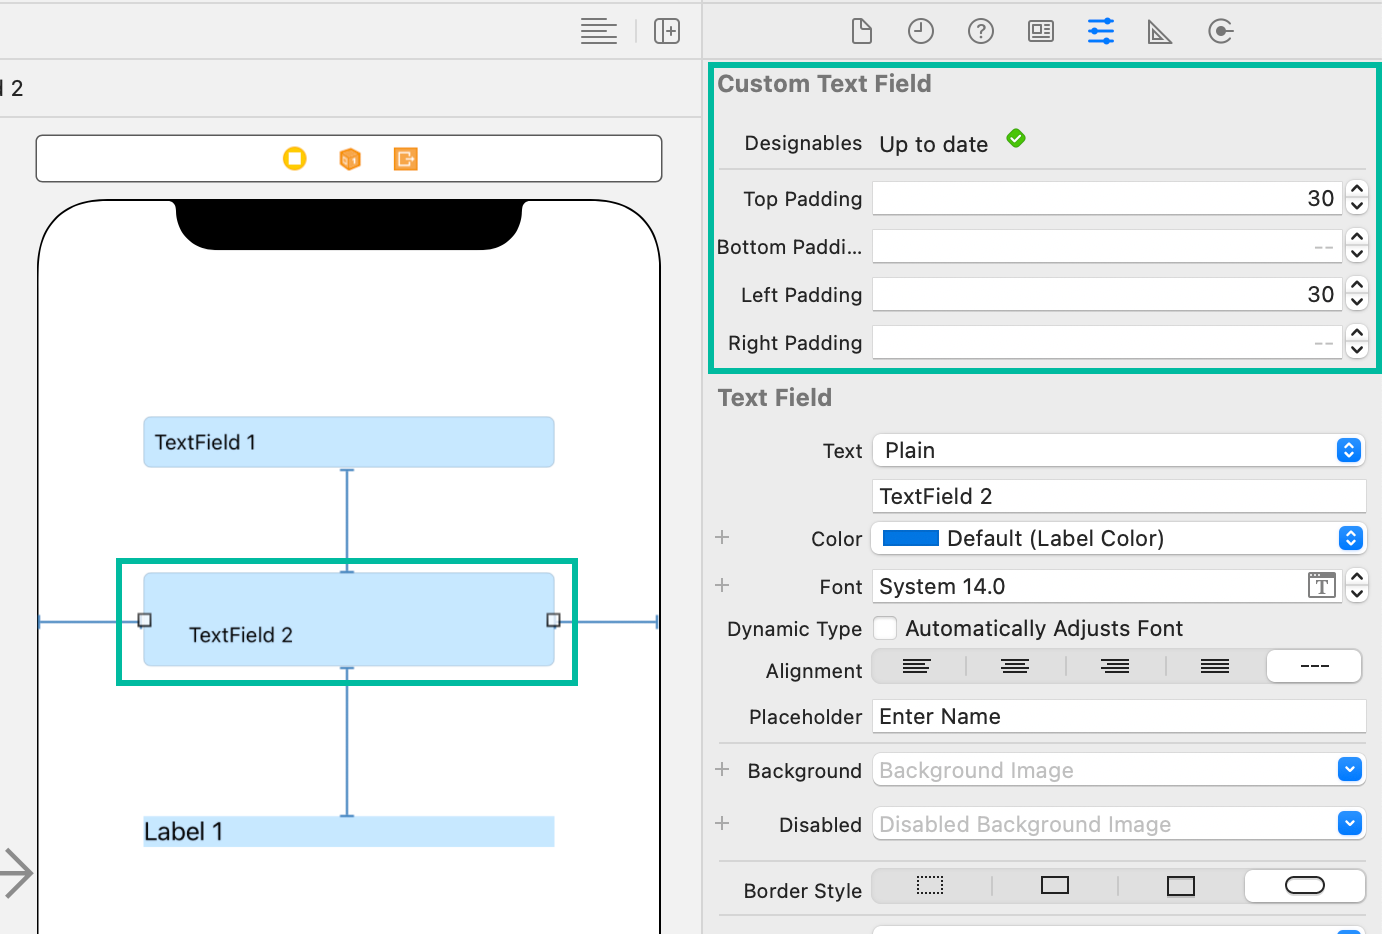
Now, set the class of “TextField 2” to CustomTextField.
In the storyboard, select TextField 2, open the Identity Inspector, and set its class to CustomTextField.
Modify CustomTextField.swift as follows to add padding:
import UIKit

@IBDesignable class CustomTextField: UITextField {

    @IBInspectable var topPadding: CGFloat = 10
    @IBInspectable var bottomPadding: CGFloat = 10
    @IBInspectable var leftPadding: CGFloat = 10
    @IBInspectable var rightPadding: CGFloat = 10

    override open func textRect(forBounds bounds: CGRect) -> CGRect {
        return bounds.inset(by: UIEdgeInsets.init(top: topPadding, left: leftPadding, bottom: bottomPadding, right: rightPadding))
    }

    override open func editingRect(forBounds bounds: CGRect) -> CGRect {
        return bounds.inset(by: UIEdgeInsets.init(top: topPadding, left: leftPadding, bottom: bottomPadding, right: rightPadding))
    }
}
Lines 5 - 8 define four properties for UIEdgeInsets, which is used to set margins around views.
The values represent the padding amounts, with the default set to 10 for all sides.
By overriding the textRect() and editingRect() methods of UITextField and applying UIEdgeInsets, we add padding inside the text field.
It's not required, but by defining these properties with @IBInspectable, you can adjust them directly in the Attribute Inspector.
Also, defining the CustomTextField class as @IBDesignable allows you to see live updates in Interface Builder after changing the custom properties.
How to Add Padding to UILabel
Next, let's add padding to a UILabel.
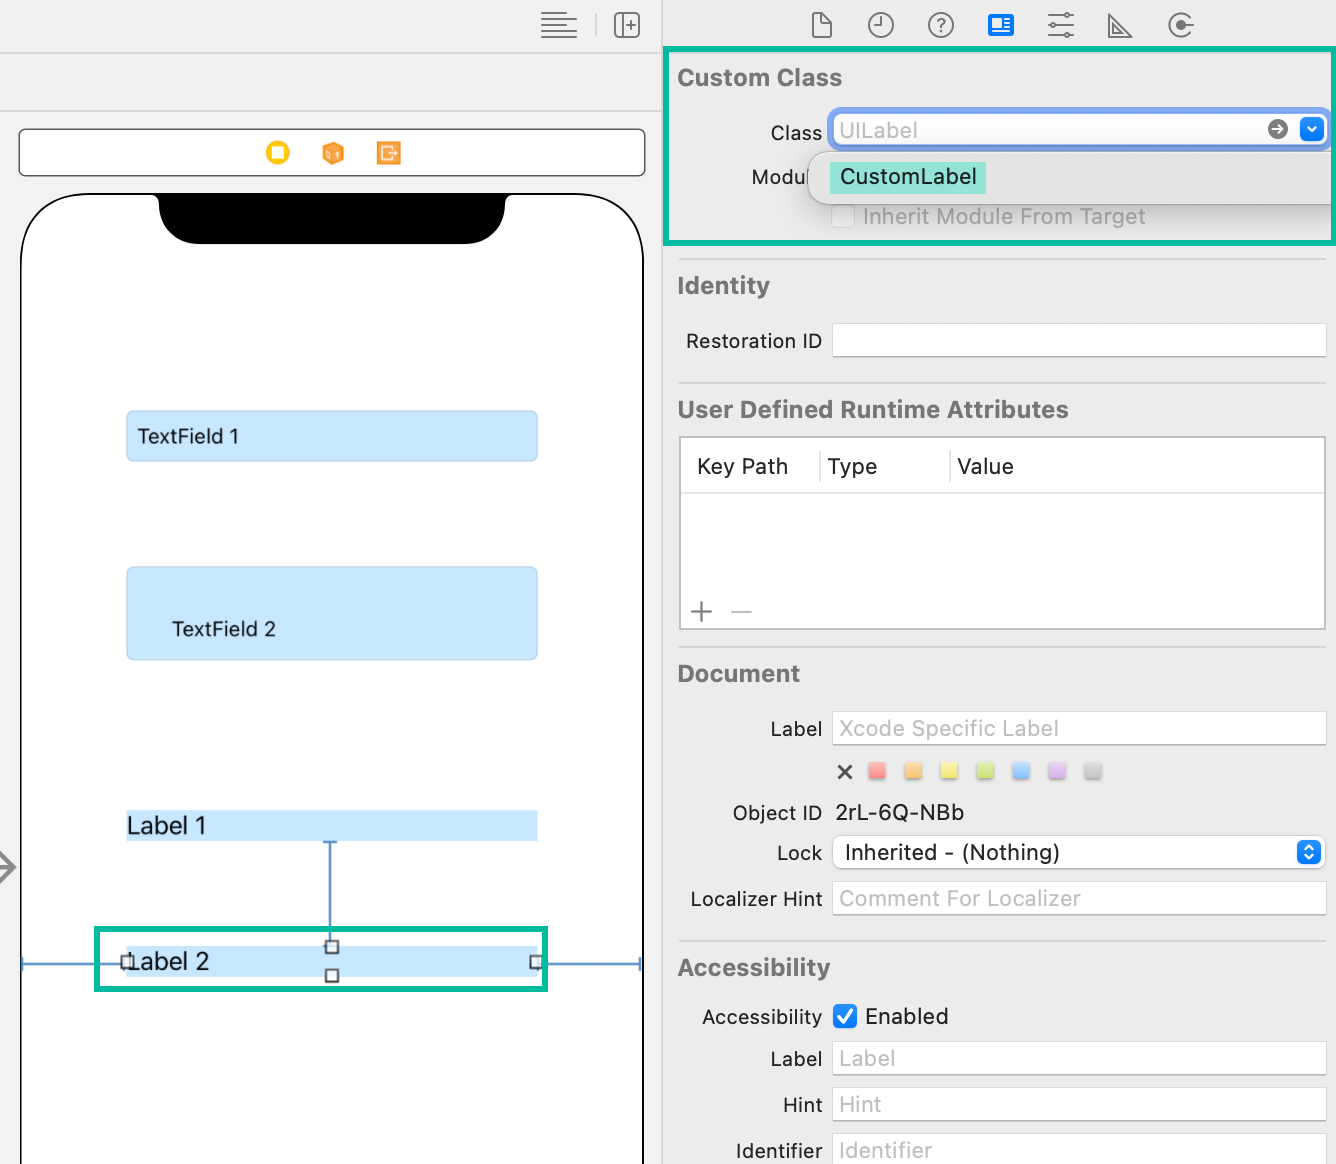
Similar to the UITextField example, create a custom UILabel subclass and set it as the class for “Label 2”.

Modify CustomLabel.swift as follows to add padding:
import UIKit

@IBDesignable class CustomLabel: UILabel {

    @IBInspectable var topPadding: CGFloat = 10
    @IBInspectable var bottomPadding: CGFloat = 10
    @IBInspectable var leftPadding: CGFloat = 10
    @IBInspectable var rightPadding: CGFloat = 10

    override func drawText(in rect: CGRect) {
        super.drawText(in: rect.inset(by: UIEdgeInsets.init(top: topPadding, left: leftPadding, bottom: bottomPadding, right: rightPadding)))
    }

    override var intrinsicContentSize: CGSize {
        var size = super.intrinsicContentSize
        size.height += (topPadding + bottomPadding)
        size.width += (leftPadding + rightPadding)
        return size
    }
}
The properties and use of @IBDesignable and @IBInspectable are the same as with UITextField.
Lines 10-12 override UILabel's drawText() method to inset the drawing rectangle using UIEdgeInsets, thereby adding padding.
Lines 14-19 override the intrinsicContentSize property, adding the padding values to the label's height and width so the layout system accounts for the extra space.
Run in Simulator and Check Padding
Now, run the iOS app in the simulator. You should see:
TextField 2 and Label 2 with padding applied.

If you set the Custom Class in the Identity Inspector for TextField 1 and Label 1 as well, they will also have the same default padding. This is useful when you want to apply consistent padding across the entire app.
That's it! We've explained how to add padding to UILabel and UITextField in Swift.