How to Customize Table View Cells in Swift
In the previous tutorial, How to Use Table View, we explained the basic usage of Table View, which is commonly used in iOS app development.
Last time we used the default style, but this time we'll show you how to customize a UITableViewCell.
By customizing a Table View Cell, you can place any objects anywhere you like within the cell.
In the default style, the image can only be displayed on the left side of the cell, so let's place the image on the right side and create a Table View Cell like this:

Prepare to Use Table View
First, let's prepare to use Table View and Table View Cell.
The procedure is exactly the same as in “How to Use Table View,” so if you've already done that, just open the same project and continue from here.
If you haven't done “How to Use Table View” yet, please follow steps 3-1 to 3-4 in How to Use Table View to prepare Table View and Table View Cell.
Prepare the Animal Data to Display
Last time, we used a string array to store the data, but this time we will define a struct called Animal to store the animal data, and then display it in the Table View.
A struct is a custom data type that can hold multiple values of different data types.
For each cell, we want to display three pieces of information: the animal's English name, Japanese name, and image.
So we'll create a struct called Animal that can store three strings: nameEN, nameJP, and imageName.
Create the Animal Struct
From the menu bar, select File > New > File from Template..., choose Swift File under iOS, click Next, and create a file named Animal.swift.
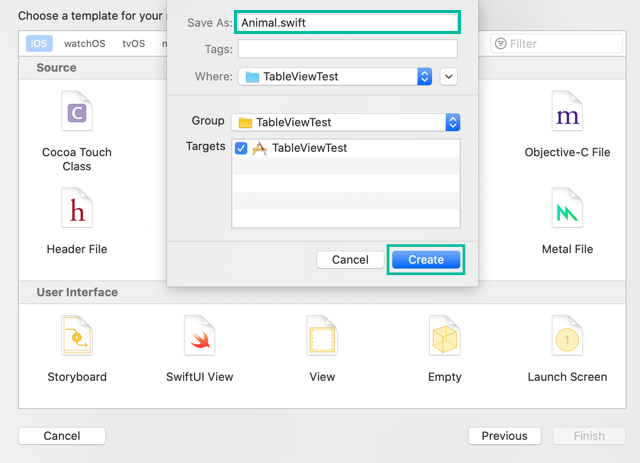
Open Animal.swift and add the following code:
struct Animal {
    private(set) public var nameEN : String
    private(set) public var nameJP : String
    private(set) public var imageName : String

    init(nameEN: String, nameJP: String, imageName: String) {
        self.nameEN = nameEN
        self.nameJP = nameJP
        self.imageName = imageName
    }
}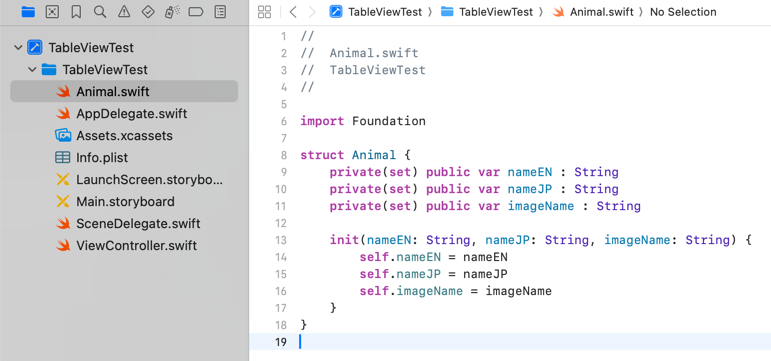
In the Animal struct, we define three string properties: nameEN, nameJP, and imageName.
We use private(set) public so that the values can be read from anywhere, but can only be set through the initializer.
Add Animal Images to Assets.xcassets
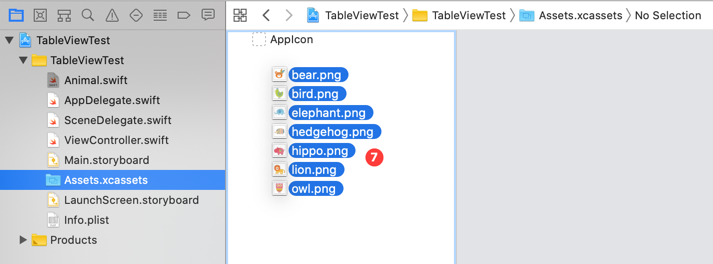
Next, add the animal images to Assets.
In the project navigator on the left, select Assets.xcassets.
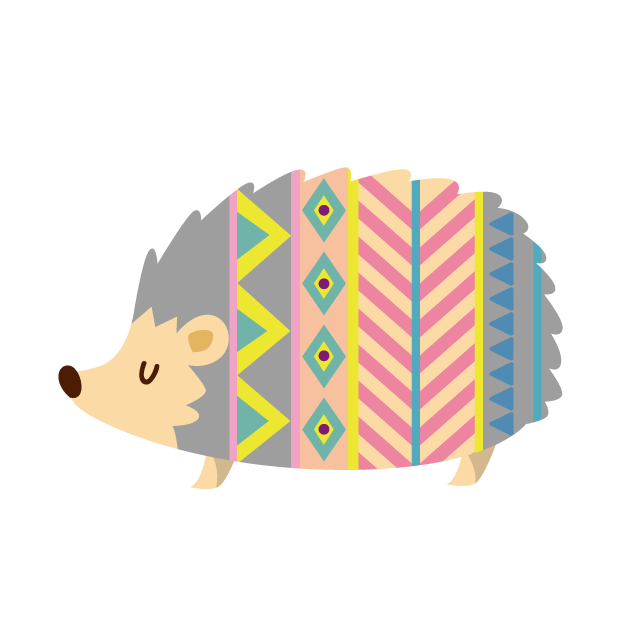
Then drag and drop the following images into the left pane of the opened screen:
 |
 |
 |
 |
 |
 |
 |
Create an Array of Animals
Next, create an array of Animal objects to display the data.
Open ViewController.swift and add the following code:
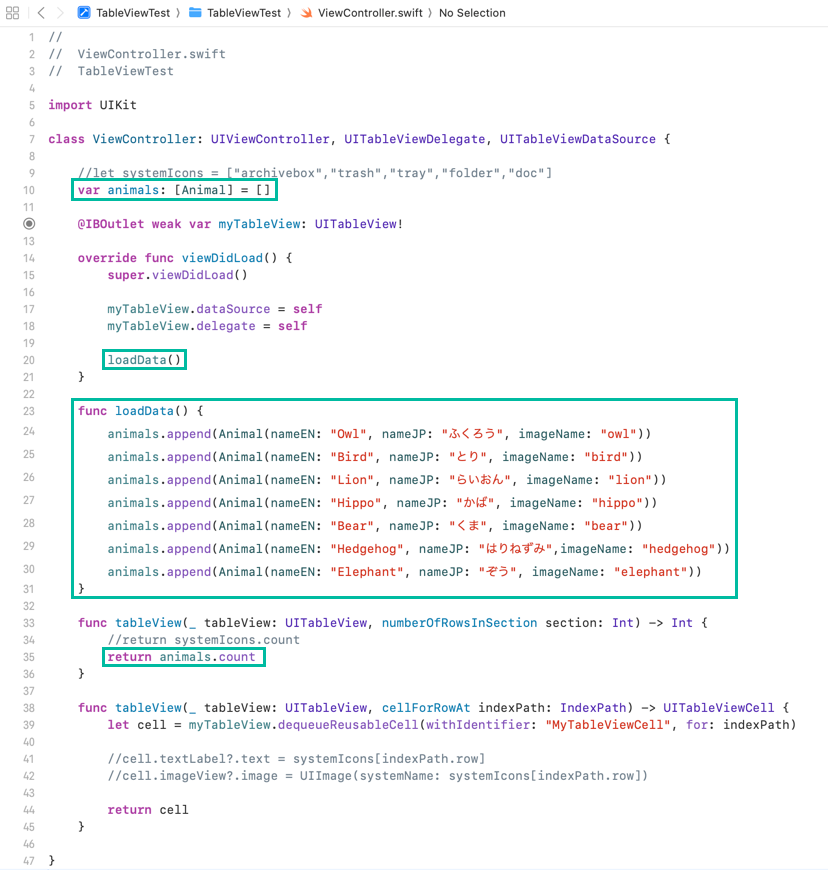
First, define an array of Animal objects named animals:
var animals: [Animal] = []
In the loadData() method, create Animal objects for each animal and add them to the animals array:
func loadData() {
    animals.append(Animal(nameEN: "Owl", nameJP: "ふくろう", imageName: "owl"))
    animals.append(Animal(nameEN: "Bird", nameJP: "とり", imageName: "bird"))
    animals.append(Animal(nameEN: "Lion", nameJP: "らいおん", imageName: "lion"))
    animals.append(Animal(nameEN: "Hippo", nameJP: "かば", imageName: "hippo"))
    animals.append(Animal(nameEN: "Bear", nameJP: "くま", imageName: "bear"))
    animals.append(Animal(nameEN: "Hedgehog", nameJP: "はりねずみ",imageName: "hedgehog"))
    animals.append(Animal(nameEN: "Elephant", nameJP: "ぞう", imageName: "elephant"))
}
Then, in viewDidLoad(), call loadData() to generate the data:
loadData()
We no longer use the systemIcons array from the previous tutorial, so remove its declaration and any references to it. To make it clear, here we've commented it out.
In tableView(_:numberOfRowsInSection:), return animals.count instead of systemIcons.count:
return animals.count
Customize the Table View Cell
Now let's get into the main topic: how to customize a Table View Cell.
Create the AnimalTableViewCell Class
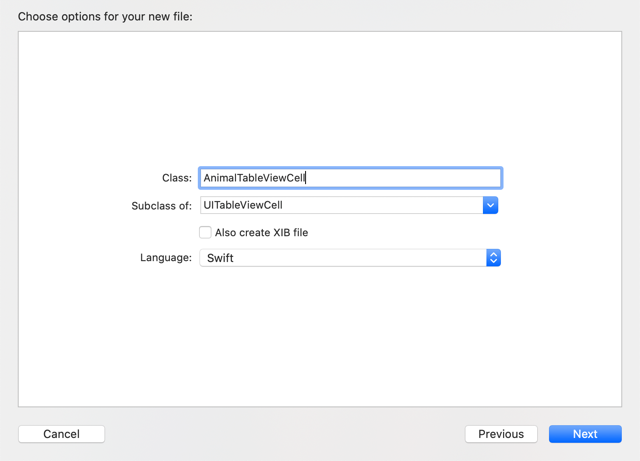
First, create a custom UITableViewCell class.
From the menu bar, select File > New > File from Template..., choose Cocoa Touch Class under iOS, click Next, and create a file with Class AnimalTableViewCell and Subclass of UITableViewCell.
Set the Class for the Table View Cell
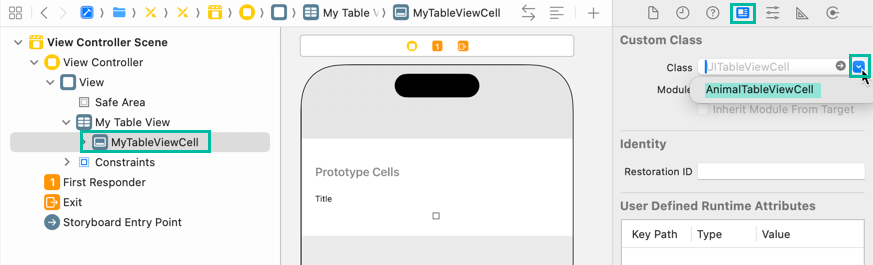
Next, set the Table View Cell's class to AnimalTableViewCell.
In the project navigator, select Main.storyboard.
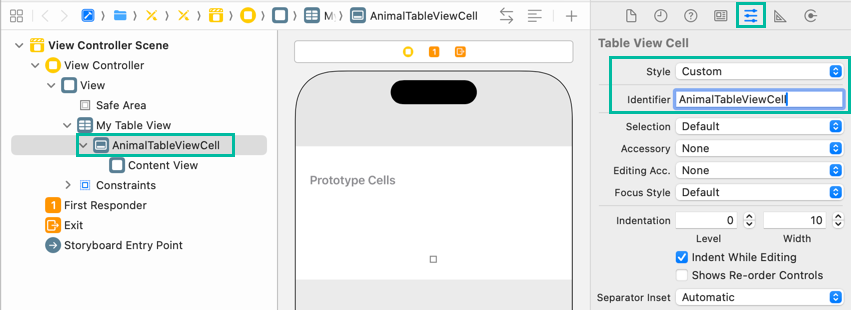
With the Table View Cell selected, open the Identity inspector in the right utility area.
From the Class dropdown list under Custom Class, select AnimalTableViewCell.
Place Objects in the Table View Cell
Now place objects such as Labels and ImageViews inside the Table View Cell.
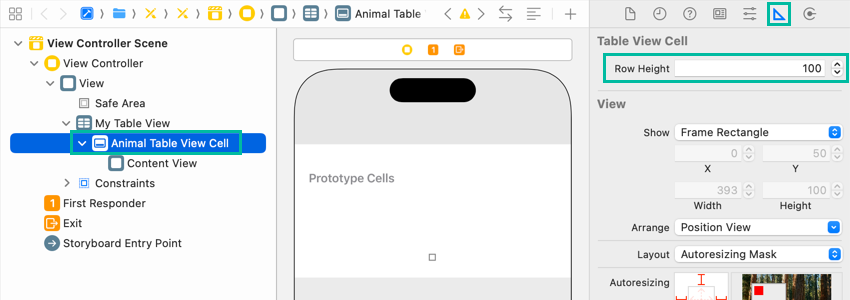
First, set the row height of the Table View and Table View Cell to 100.
Select the Table View, open the Size inspector, and set the Row Height to 100.
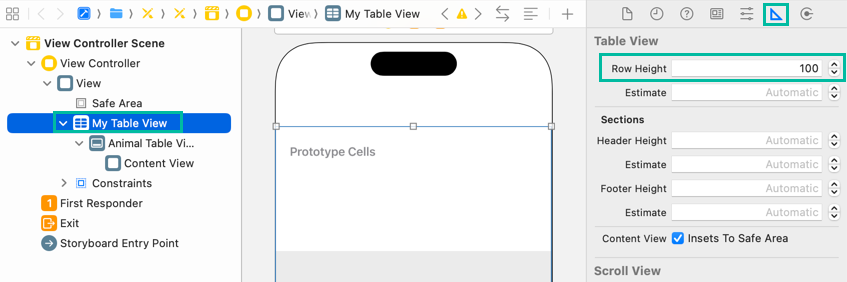
Then select the Table View Cell, open the Size inspector, and also set its Row Height to 100.
Next, with the Table View Cell still selected, open the Attributes inspector, set the Style to Custom, and set the Identifier to AnimalTableViewCell.
Now let's place Labels and Image Views inside the Table View Cell.
Place one Image View on the right side and three Labels on the left, as shown below:

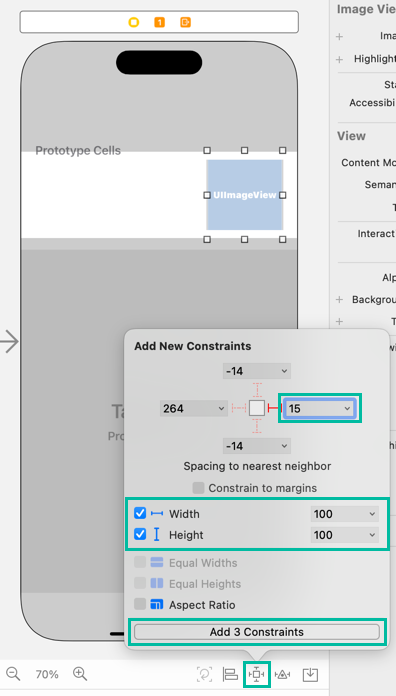
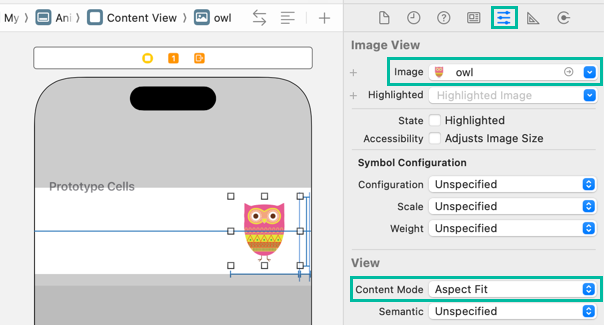
Click the ➕ button at the top right to open the Object Library, search for UIImageView, and drag & drop it into the right side of the Table View Cell.

After placing the Image View roughly where you want it, add the following constraints:
- Spacing to nearest neighbor - Right: 15
- Width: 100
- Height: 100
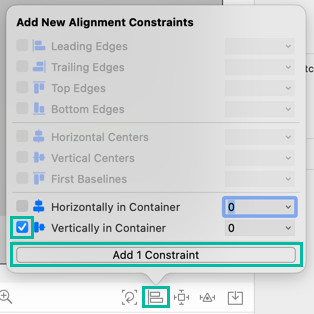
- Alignment: Vertically in Container
For design preview purposes, open the Attributes inspector and select “owl” for the image.
Leave Content Mode as Aspect Fit.
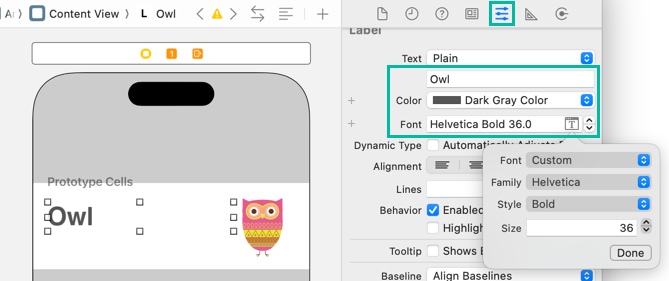
Next, place a Label for the English name.
Drag a Label from the Object Library and set it up as follows in the Attributes inspector:
- Text: Owl
- Color: Dark Gray Color
- Font: Helvetica Bold 36.0
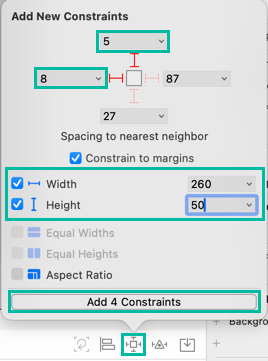
Add these constraints:
- Spacing to nearest neighbor - Top: 5
- Spacing to nearest neighbor - Left: 8
- Width: 260
- Height: 50
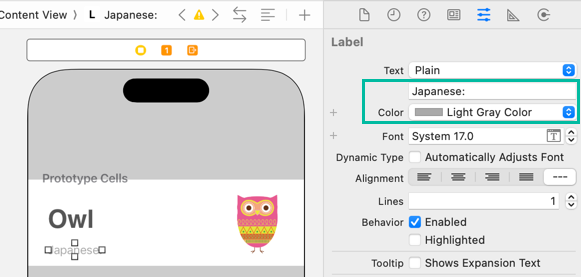
Next, place a Label for “Japanese:” as follows:
- Text: Japanese:
- Color: Light Gray Color
Add these constraints:
- Spacing to nearest neighbor - Top: 1
- Spacing to nearest neighbor - Left: 8
- Width: 80
- Height: 20
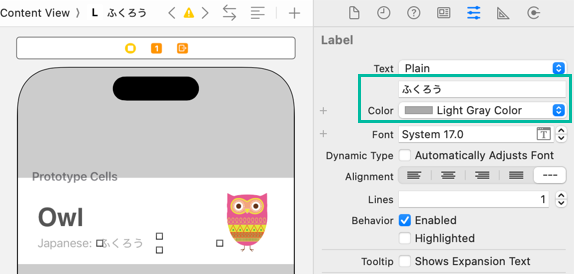
Finally, place a Label for the Japanese name:
- Text: ふくろう
- Color: Light Gray Color
Add these constraints:
- Spacing to nearest neighbor - Top: 1
- Spacing to nearest neighbor - Left: 1
- Width: 180
- Height: 20
The values shown here are what I used, but feel free to adjust label sizes and positions to your liking.
Create Outlets for the Table View Cell
Next, create outlets for the Table View Cell.
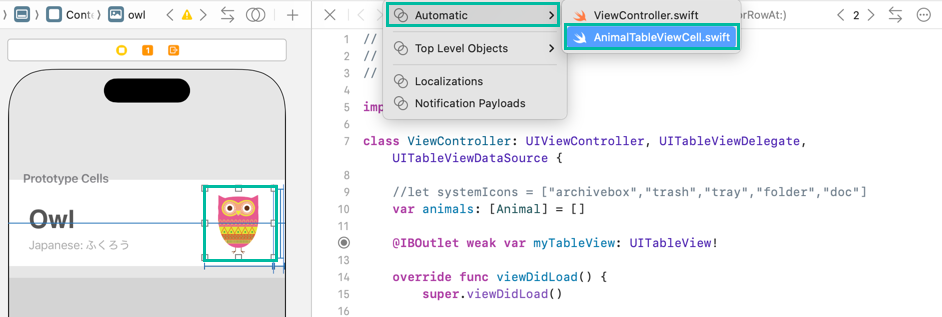
In the storyboard, select the Image View or Labels inside AnimalTableViewCell, then open the Assistant Editor (Editor > Assistant Editor or from Adjust Editor Options).
Make sure the file opened in Assistant Editor is AnimalTableViewCell.swift.
If not, click Automatic at the top and change it to AnimalTableViewCell.swift.
Create the following three outlets for the English name label, Japanese name label, and Image View:
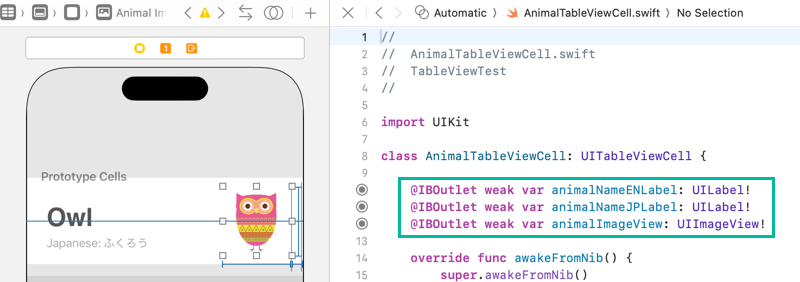
@IBOutlet weak var animalNameENLabel: UILabel!
@IBOutlet weak var animalNameJPLabel: UILabel!
@IBOutlet weak var animalImageView: UIImageView!
That completes the preparation for using a custom Table View Cell.
Display Data in the Table View
Now let's display the data in the custom Table View Cell.
Add the following code to the tableView(_:cellForRowAt:) method:
func tableView(_ tableView: UITableView, cellForRowAt indexPath: IndexPath) -> UITableViewCell {

    //let cell = myTableView.dequeueReusableCell(withIdentifier: "MyTableViewCell", for: indexPath)

    guard let cell = myTableView.dequeueReusableCell(withIdentifier: "AnimalTableViewCell", for: indexPath) as? AnimalTableViewCell else {
        fatalError("Dequeue failed: AnimalTableViewCell.")
    }

    cell.animalNameENLabel.text = animals[indexPath.row].nameEN
    cell.animalNameJPLabel.text = animals[indexPath.row].nameJP
    cell.animalImageView.image = UIImage(named: animals[indexPath.row].imageName)

    return cell
}
Here, we use guard let to cast the dequeued UITableViewCell to AnimalTableViewCell, and terminate execution with fatalError if it fails.
We then set the nameEN and nameJP of the Animal object at indexPath.row in the animals array to cell.animalNameENLabel.text and cell.animalNameJPLabel.text, respectively.
Next, we create a UIImage from imageName and set it to cell.animalImageView.image.
Now we've finished writing the code to display data in the custom Table View Cell.
For reference, here's the complete code for ViewController.swift:
import UIKit

class ViewController: UIViewController, UITableViewDelegate, UITableViewDataSource {

    var animals: [Animal] = []

    @IBOutlet weak var myTableView: UITableView!

    override func viewDidLoad() {
        super.viewDidLoad()

        myTableView.dataSource = self
        myTableView.delegate = self

        loadData()
    }

    func loadData() {
        animals.append(Animal(nameEN: "Owl", nameJP: "ふくろう", imageName: "owl"))
        animals.append(Animal(nameEN: "Bird", nameJP: "とり", imageName: "bird"))
        animals.append(Animal(nameEN: "Lion", nameJP: "らいおん", imageName: "lion"))
        animals.append(Animal(nameEN: "Hippo", nameJP: "かば", imageName: "hippo"))
        animals.append(Animal(nameEN: "Bear", nameJP: "くま", imageName: "bear"))
        animals.append(Animal(nameEN: "Hedgehog", nameJP: "はりねずみ",imageName: "hedgehog"))
        animals.append(Animal(nameEN: "Elephant", nameJP: "ぞう", imageName: "elephant"))
    }

    func tableView(_ tableView: UITableView, numberOfRowsInSection section: Int) -> Int {
        return animals.count
    }

    func tableView(_ tableView: UITableView, cellForRowAt indexPath: IndexPath) -> UITableViewCell {

        guard let cell = myTableView.dequeueReusableCell(withIdentifier: "AnimalTableViewCell", for: indexPath) as? AnimalTableViewCell else {
            fatalError("Dequeue failed: AnimalTableViewCell.")
        }

        cell.animalNameENLabel.text = animals[indexPath.row].nameEN
        cell.animalNameJPLabel.text = animals[indexPath.row].nameJP
        cell.animalImageView.image = UIImage(named: animals[indexPath.row].imageName)

        return cell
    }

}
Build and Run on the Simulator
Let's build and run the app.
Click the button on the left side of the toolbar to launch the selected simulator, install the app, and run it.

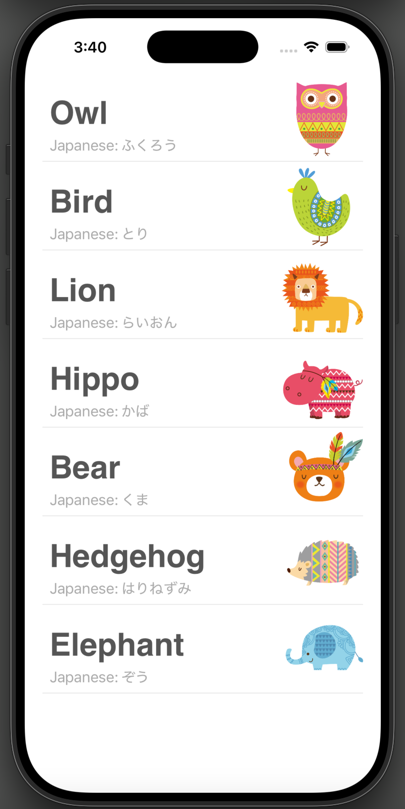
The animal information in the animals array is now displayed in the Table View according to the customized Table View Cell layout.
That's it! We've covered how to customize a Table View Cell.