How to Show a Loading Screen in an iOS App (Swift)
Here, we will explain how to display a loading screen in an iOS app using Swift when performing time-consuming tasks to indicate that processing is in progress.
Prepare an iOS app to display a loading screen
First, let's create a simple iOS app for testing, in which we can display a loading screen.
Create a new project in Xcode with [iOS] > [App].
For the design, you can place objects anywhere. In the Main storyboard's View Controller, add a Button labeled "START".
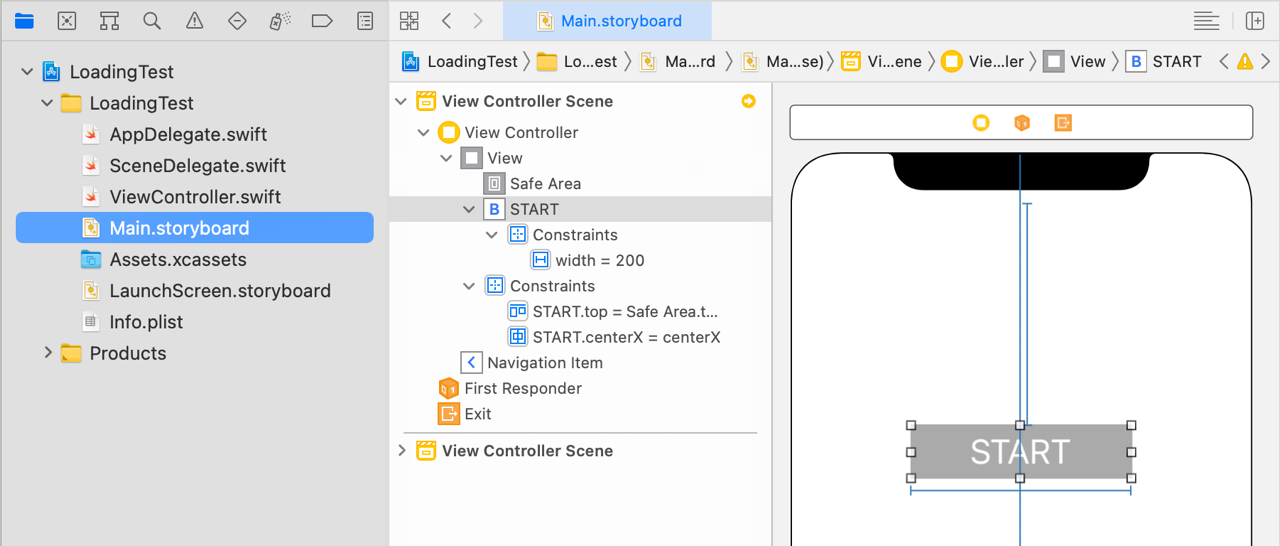
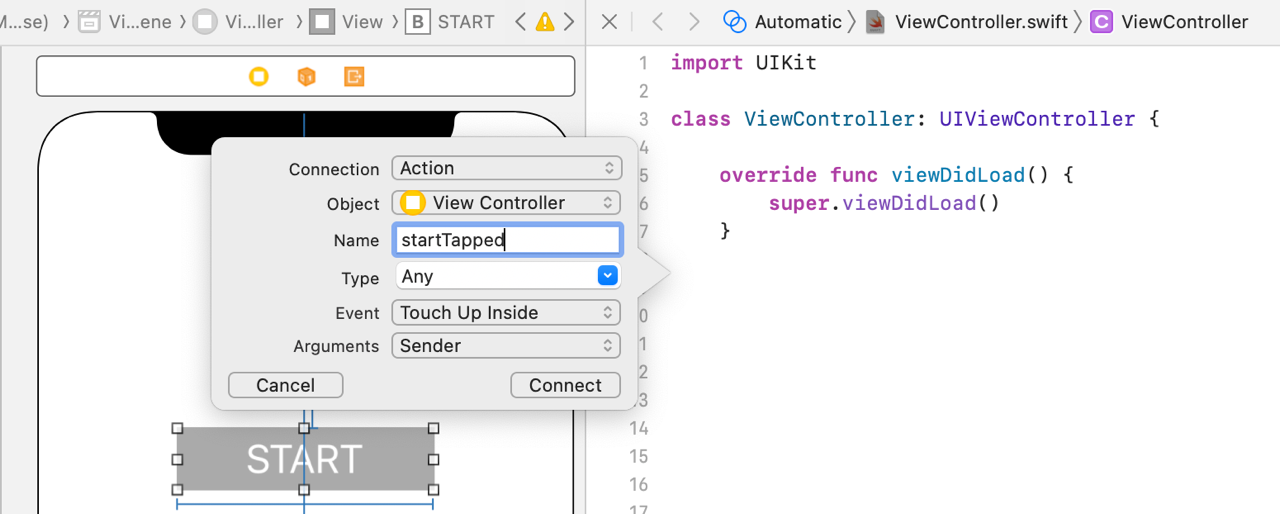
Create a TouchUpInside action from that button and name it startTapped.
import UIKit
class ViewController: UIViewController {
override func viewDidLoad() {
super.viewDidLoad()
}
@IBAction func startTapped(_ sender: Any) {
}
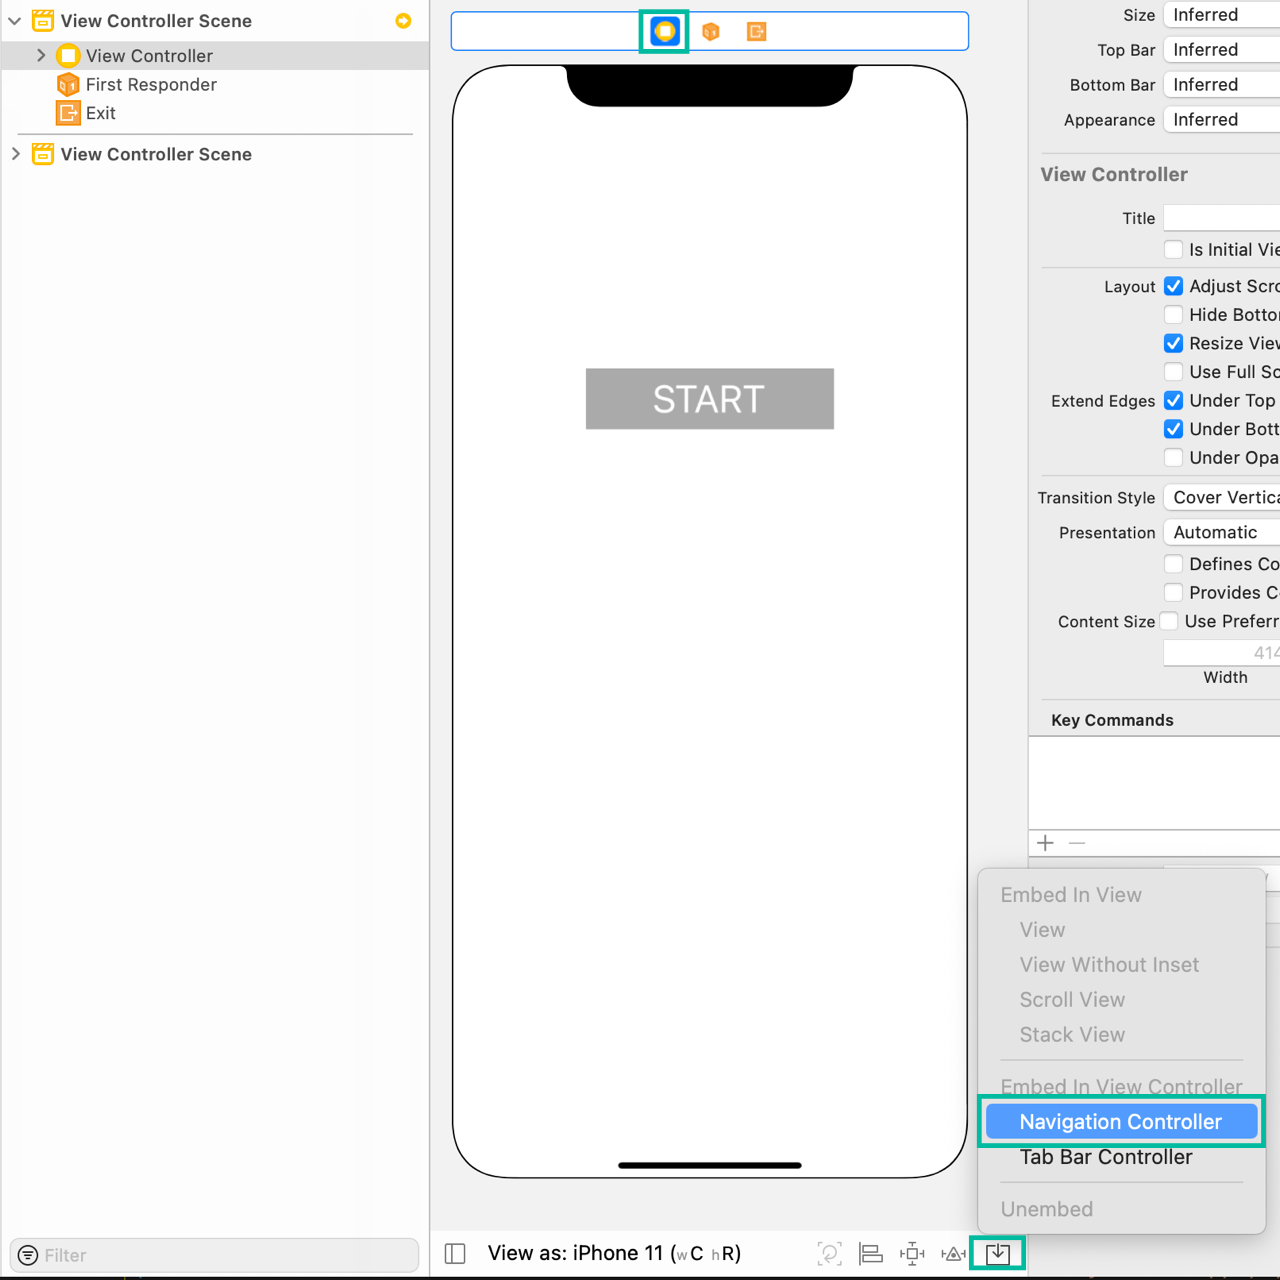
}Next, embed the View Controller into a Navigation Controller.
With the View Controller selected, click the Embed In button at the bottom right, or go to the menu Editor > Embed In and select Navigation Controller.
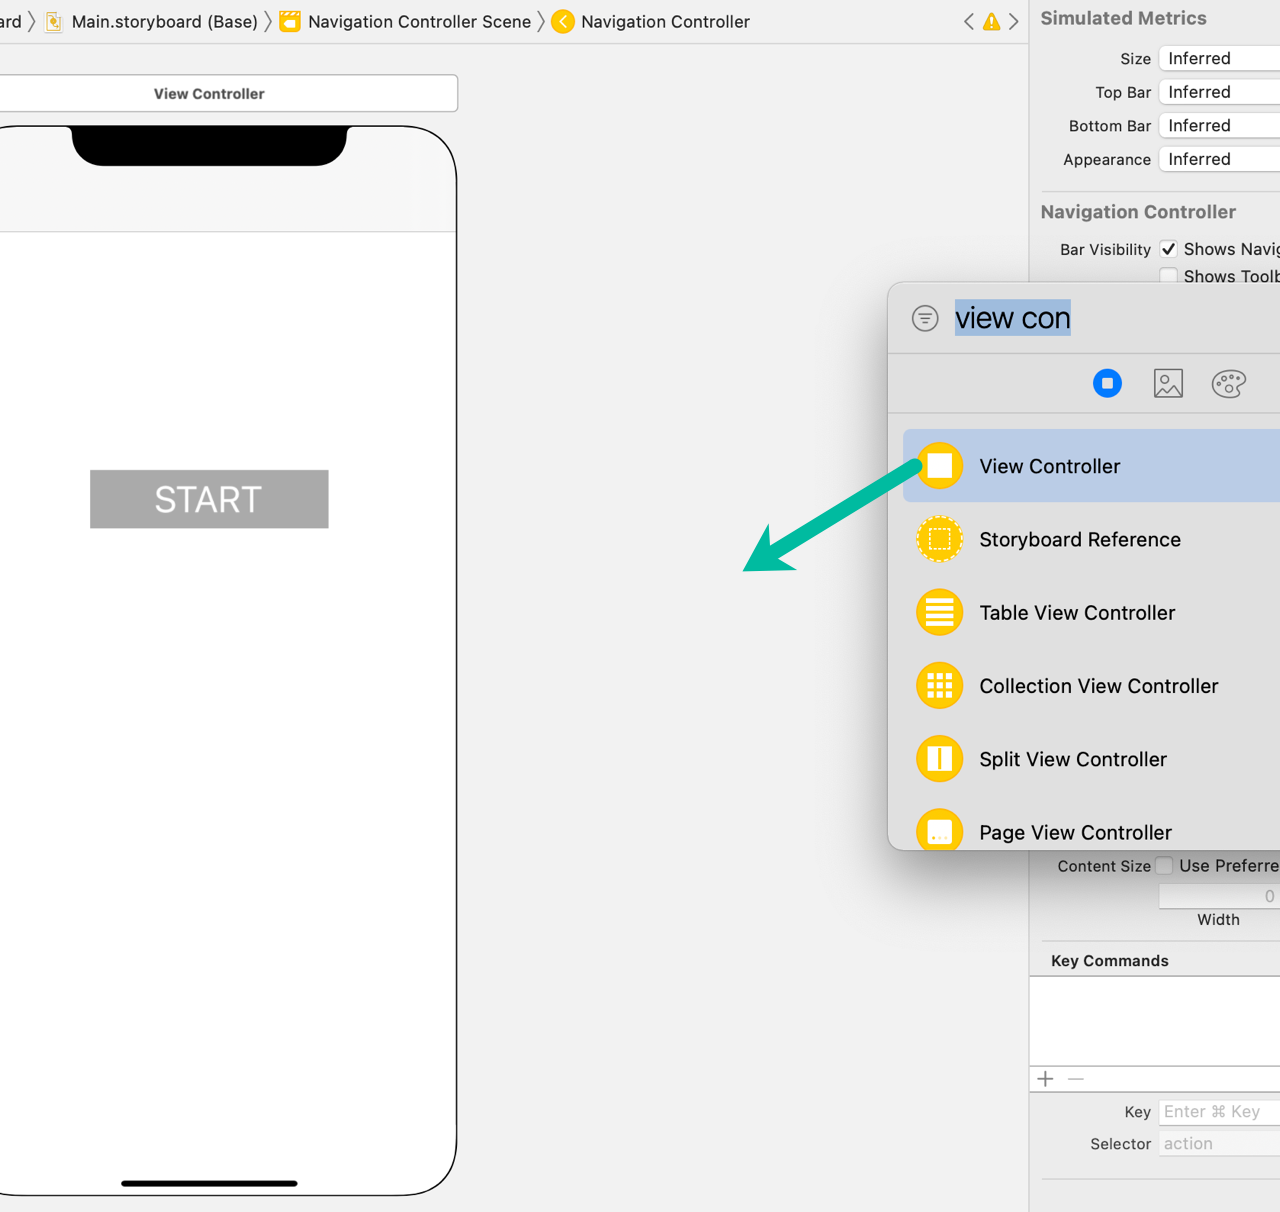
Create the destination screen for when the START button is tapped.
Add a new View Controller from the Object Library.
Create a Segue between the two View Controllers and set its identifier to startSegue.
From the first View Controller, hold down the ⌃ Control key and drag to the second View Controller. In the popup that appears, choose Manual Segue > Show to create the Segue.
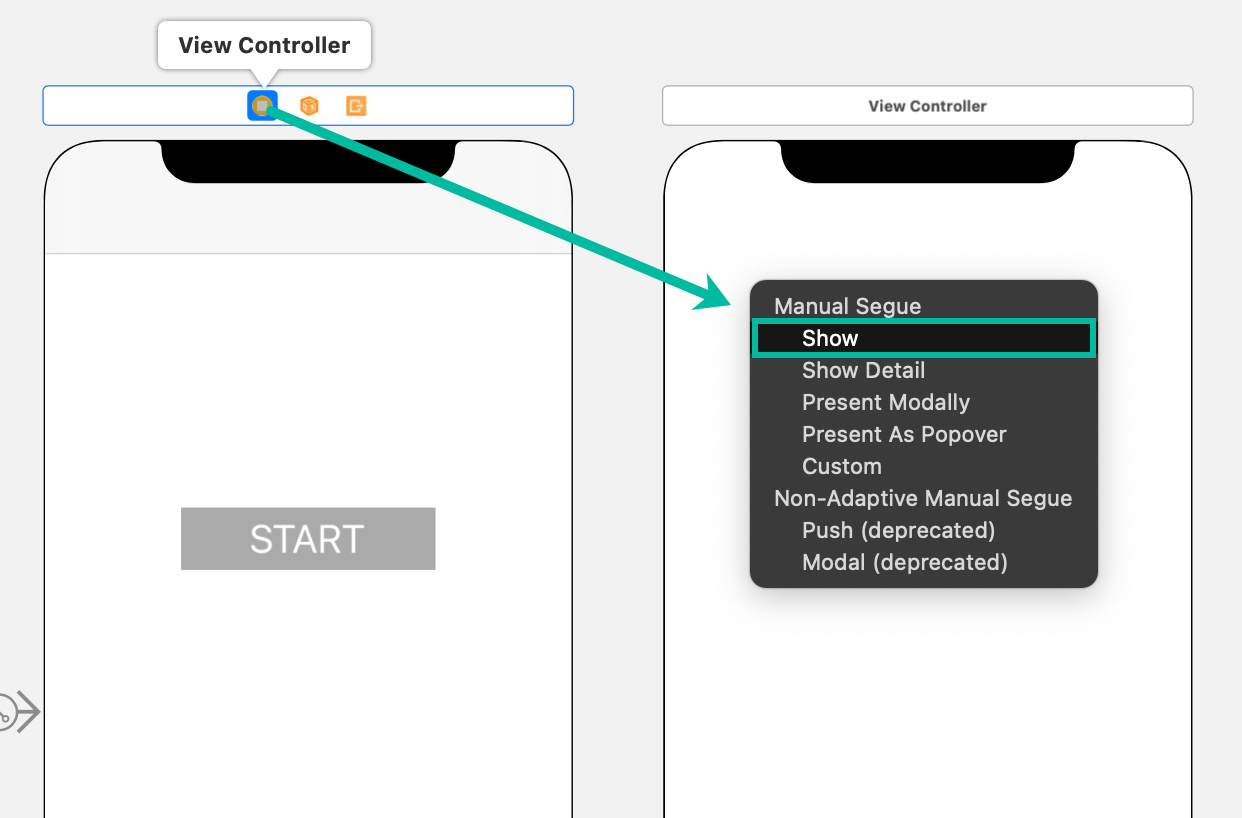
Then, set the Segue identifier to startSegue.
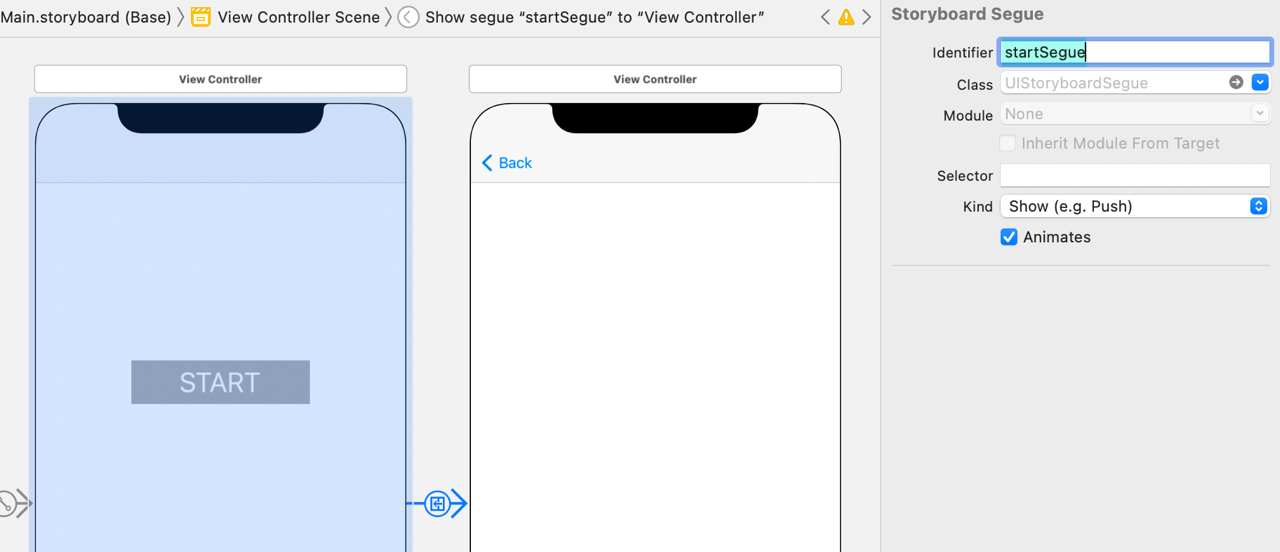
This completes the preparation for the iOS app that will display a loading screen.
How to display a loading screen in an iOS app
Now, let's display a loading screen when the START button is tapped, assuming a time-consuming task is being executed before transitioning to the next screen.
First, we'll display a loading screen that only shows a loading animation (indicator) without a message.
Modify the startTapped() method in ViewController.swift as follows:
@IBAction func startTapped(_ sender: Any) {
    let loadingView = UIView(frame: UIScreen.main.bounds)
    loadingView.backgroundColor = UIColor(red: 0, green: 0, blue: 0, alpha: 0.5)

    let activityIndicator = UIActivityIndicatorView(frame: CGRect(x: 0, y: 0, width: 100, height: 100))
    activityIndicator.center = loadingView.center
    activityIndicator.color = UIColor.white
    activityIndicator.style = UIActivityIndicatorView.Style.large
    activityIndicator.hidesWhenStopped = true
    activityIndicator.startAnimating()
    loadingView.addSubview(activityIndicator)

    UIApplication.shared.windows.filter{$0.isKeyWindow}.first?.addSubview(loadingView)

    DispatchQueue.main.asyncAfter(deadline: .now() + .seconds(2), execute: {
        loadingView.removeFromSuperview()
        self.performSegue(withIdentifier: "startSegue", sender: nil)
    })
}
Lines 2 - 3 create a black semi-transparent UIView called loadingView.
Lines 5 - 11 create a UIActivityIndicatorView for the loading animation, start the animation, and add it as a subview of loadingView.
Line 13 adds loadingView as a subview of the main window so it appears on screen.
Line 15 simulates a time-consuming task by executing the code after a 2-second delay.
Line 16 removes loadingView from the screen, and line 17 performs the segue to transition to the second screen.
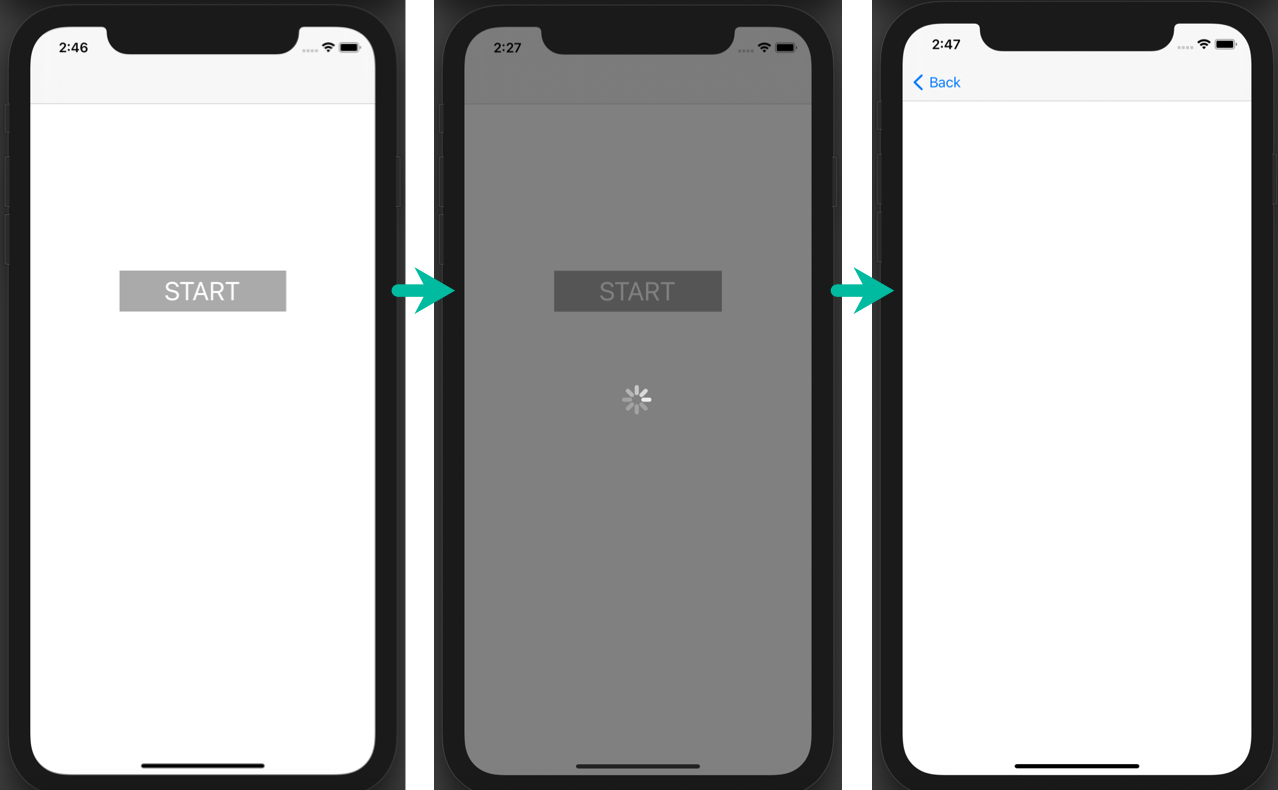
Now, if you run the app and tap the START button, a loading screen like the one below will appear, and about 2 seconds later, it will transition to the next screen.
How to display a loading screen with a message in an iOS app
Next, let's display a message such as “Processing...” along with the loading screen.
Modify the startTapped() method in ViewController.swift as follows:
@IBAction func startTapped(_ sender: Any) {
    let loadingView = UIView(frame: UIScreen.main.bounds)
    loadingView.backgroundColor = UIColor(red: 0, green: 0, blue: 0, alpha: 0.5)

    let activityIndicator = UIActivityIndicatorView(frame: CGRect(x: 0, y: 0, width: 100, height: 100))
    activityIndicator.center = loadingView.center
    activityIndicator.color = UIColor.white
    activityIndicator.style = UIActivityIndicatorView.Style.large
    activityIndicator.hidesWhenStopped = true
    activityIndicator.startAnimating()
    loadingView.addSubview(activityIndicator)

    let label = UILabel(frame: CGRect(x: 0, y: 0, width: 300, height: 30))
    label.center = CGPoint(x: activityIndicator.frame.origin.x + activityIndicator.frame.size.width / 2, y: activityIndicator.frame.origin.y + 90)
    label.textColor = UIColor.white
    label.textAlignment = .center
    label.text = "Processing..."
    loadingView.addSubview(label)

    UIApplication.shared.windows.filter{$0.isKeyWindow}.first?.addSubview(loadingView)

    DispatchQueue.main.asyncAfter(deadline: .now() + .seconds(2), execute: {
        loadingView.removeFromSuperview()
        self.performSegue(withIdentifier: "startSegue", sender: nil)
    })
}
Lines 13 - 18 have been added to the previous code.
Here, we created a UILabel for the message and added it as a subview of loadingView.
The displayed message is set with label.text. Depending on the length of the message, you may need to adjust the label's position and size.
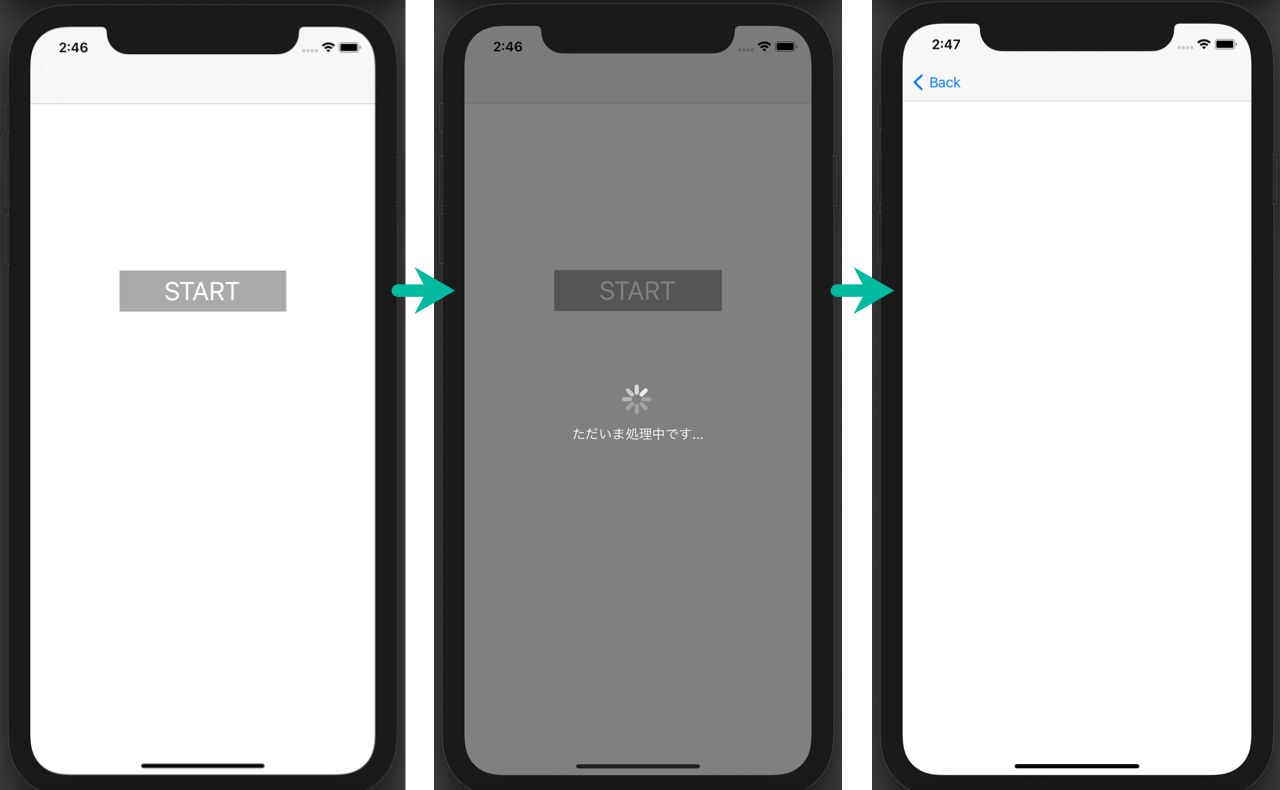
Now, if you run the app and tap the START button, a loading screen with the message "Processing..."("ただいま処理中です..." in Japanese) will appear, and about 2 seconds later, it will transition to the next screen, as shown in the first video.
That's how to display a loading screen in an iOS app using Swift.