How to Make HTTP POST Requests with URLSession (Basic Auth + JSON)
In this article, we will explain how to make an HTTP POST request with Basic Authentication using URLSession in Swift.
The request and response bodies will be exchanged in JSON format.
If you don't need Basic Authentication, simply remove the lines where Basic Auth is set up (explained later).
Overview of the Test REST API
For this article, we created a simple REST API that uses Basic Authentication to retrieve item information.
The API URL, username, and password for Basic Authentication are as follows:
let apiURL = "https://softmoco.com/getItemInfo.php"
let apiUsername = "APIUser"
let apiPassword = "APIPassword123"
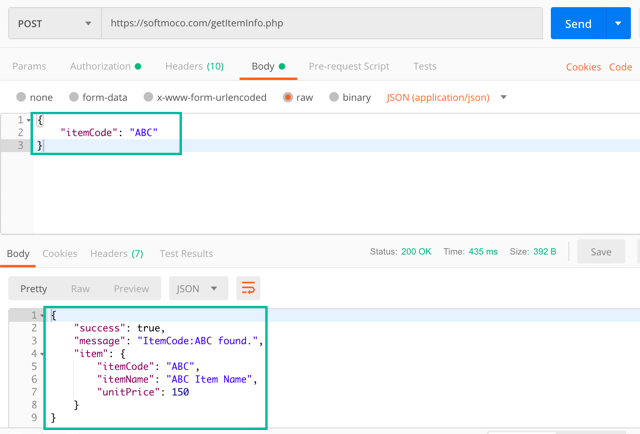
The request body posts the itemCode in JSON format like this:
{
    "itemCode": "Item Code to search"
}
If the “Item Code to search” is "ABC", the response body will return the following JSON with the item information:
{
    "success": true,
    "message": "ItemCode:ABC found.",
    "item": {
        "itemCode": "ABC",
        "itemName": "ABC Item Name",
        "unitPrice": 150
    }
}
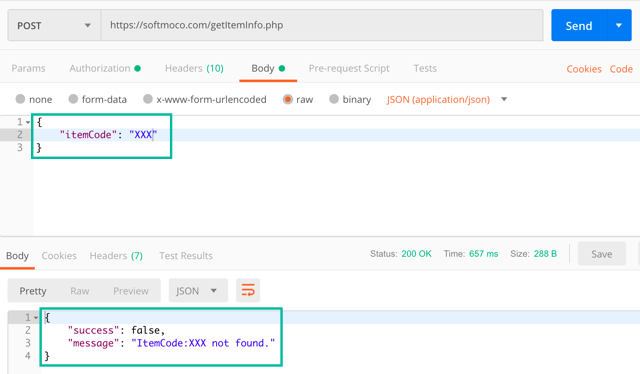
If the itemCode is anything other than "ABC", the response body will look like this:
{
    "success": false,
    "message": "ItemCode:XXX not found."
}
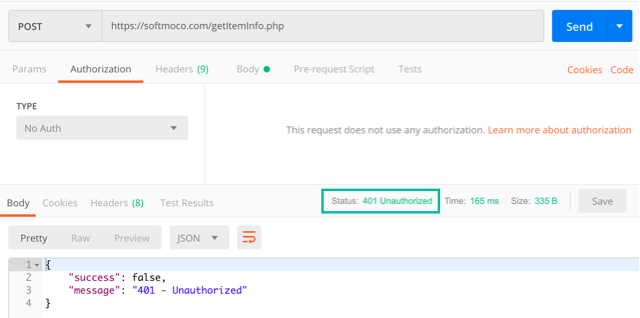
If authentication is missing, or the Basic Authentication username or password is incorrect, the server will return Status: 401 Unauthorized.
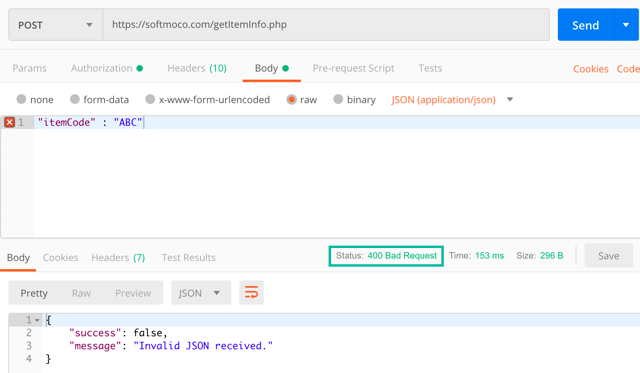
If the request body is invalid, the server will return Status: 400 Bad Request.
We'll use this REST API to fetch data from Swift with an HTTP POST request.
Description of the Test App
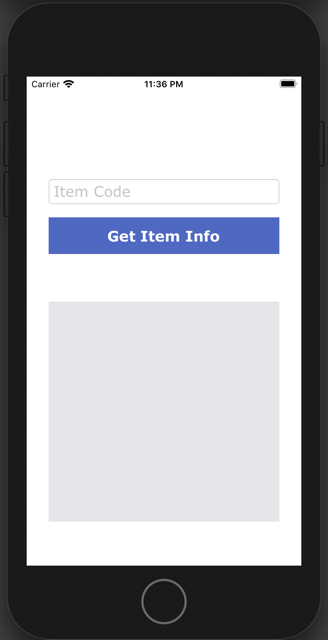
The test app is a simple one-screen app with only a Text Field, Button, and Text View:
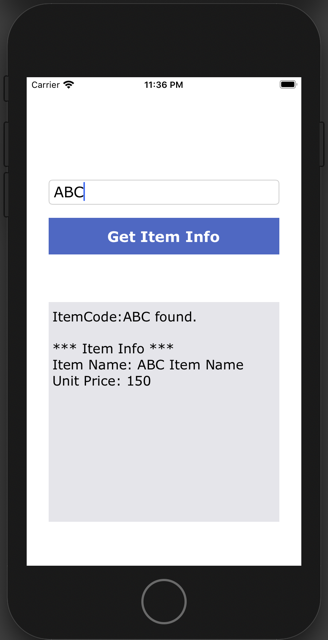
If you type “ABC” in the Text Field and tap the [Get Item Info] button, the REST API request is sent. Since the response's success is true, the message and item information are displayed as follows:
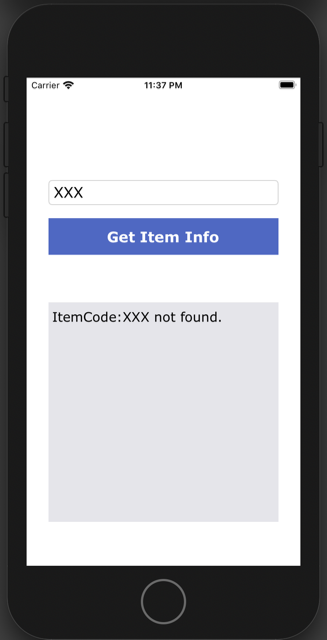
If you type anything other than “ABC” and tap the button, the REST API request is sent, the response's success is false, so only the message is displayed:
Building the Test App
In Xcode, create a new project with [iOS] > [App].
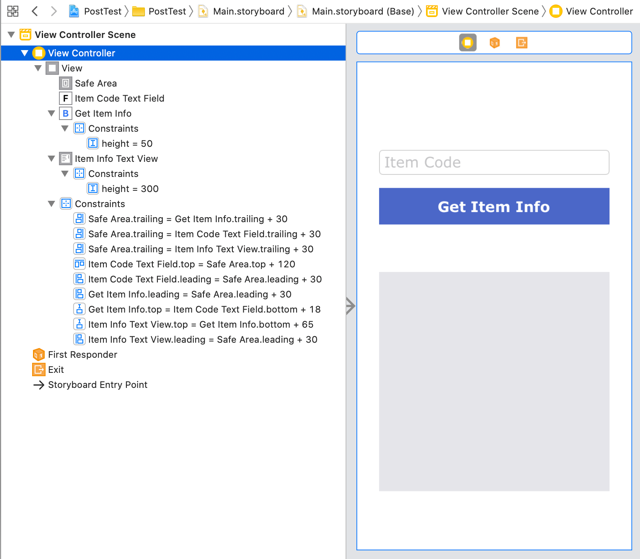
On the storyboard, add a Text Field, Button, and Text View as shown below (layout can be simple):
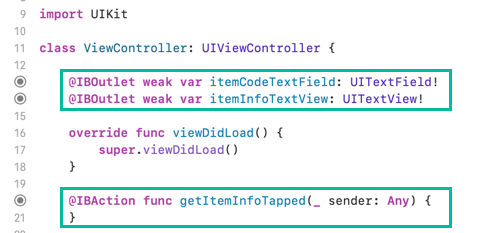
In ViewController.swift, create outlets for the Text Field and Text View, and an action for the Button's TouchUpInside event:
@IBOutlet weak var itemCodeTextField: UITextField!
@IBOutlet weak var itemInfoTextView: UITextView!

@IBAction func getItemInfoTapped(_ sender: Any) {
}
Creating the Item Struct
To hold the item information received from the response, create a file named Item.swift and add the following code:
struct Item: Codable {
    var itemCode: String
    var itemName: String
    var unitPrice: Int
}
In this example, we're just displaying the data, so using the struct isn't strictly necessary. But in real-world development, you'll likely use the received data later, so we show how to decode JSON into an Item object.
How to Make an HTTP POST Request with URLSession
Now let's add the code for making the HTTP POST request using URLSession inside the getItemInfoTapped action method:
@IBAction func getItemInfoTapped(_ sender: Any) {

    itemInfoTextView.text = "";

    let itemCode = itemCodeTextField.text;

    if itemCode?.isEmpty ?? true {
        itemInfoTextView.text = "Please enter Item Code."
        return;
    }

    // API call
    let apiURL = "https://softmoco.com/getItemInfo.php"
    let apiUsername = "APIUser"
    let apiPassword = "APIPassword123"

    guard let url = URL(string: apiURL) else { return }

    let authString = String(format: "%@:%@", apiUsername, apiPassword)
    let authData = authString.data(using: String.Encoding.utf8)!
    let authBase64 = authData.base64EncodedString()

    let data: [String: Any] = ["itemCode": itemCode!]
    guard let httpBody = try? JSONSerialization.data(withJSONObject: data, options: []) else { return }

    var request = URLRequest(url: url)
    request.httpMethod = "POST"
    request.setValue("Application/json", forHTTPHeaderField: "Content-Type")
    request.setValue("Basic \(authBase64)", forHTTPHeaderField: "Authorization")
    request.httpBody = httpBody

    URLSession.shared.dataTask(with: request) {(data, response, error) in

        if let error = error {
            print("Failed to get item info: \(error)")
            return;
        }

        if let response = response as? HTTPURLResponse {
            if !(200...299).contains(response.statusCode) {
                print("Response status code does not indicate success: \(response.statusCode)")
                return
            }
        }

        if let data = data {
            do {
                let jsonDict = try JSONSerialization.jsonObject(with: data, options: []) as? [String: Any]
                let success = jsonDict!["success"] as! Bool
                var message = jsonDict!["message"] as! String

                if(success) {
                    let jsonData = try JSONSerialization.data(withJSONObject: jsonDict!["item"]!, options: .prettyPrinted)

                    if let item = try? JSONDecoder().decode(Item.self, from: jsonData as Data) {
                        message += "\n\n*** Item Info ***\nItem Name: \(item.itemName)\nUnit Price: \(item.unitPrice)"
                    }
                }

                DispatchQueue.main.async {
                   self.itemInfoTextView.text = message
                }
            } catch {
                print("Error parsing the response.")
            }
        } else {
            print("Unexpected error.")
        }

    }.resume()
}
Now let's explain the code step by step.
itemInfoTextView.text = "";

let itemCode = itemCodeTextField.text;

if itemCode?.isEmpty ?? true {
    itemInfoTextView.text = "Please enter Item Code."
    return;
}
Here, we reset the Text View and check if the Text Field is empty. If it is, we display “Please enter Item Code.” in the Text View and stop execution.
let authString = String(format: "%@:%@", apiUsername, apiPassword)
let authData = authString.data(using: String.Encoding.utf8)!
let authBase64 = authData.base64EncodedString()

let data: [String: Any] = ["itemCode": itemCode!]
guard let httpBody = try? JSONSerialization.data(withJSONObject: data, options: []) else { return }

var request = URLRequest(url: url)
request.httpMethod = "POST"
request.setValue("Application/json", forHTTPHeaderField: "Content-Type")
request.setValue("Basic \(authBase64)", forHTTPHeaderField: "Authorization")
request.httpBody = httpBody
The highlighted lines handle Basic Authentication. The username and password are joined, base64-encoded, and set in the Authorization header of the URLRequest object.
If you don't need Basic Authentication, delete the highlighted lines.
let data: [String: Any] = ["itemCode": itemCode!]
guard let httpBody = try? JSONSerialization.data(withJSONObject: data, options: []) else { return }

var request = URLRequest(url: url)
request.httpMethod = "POST"
request.setValue("Application/json", forHTTPHeaderField: "Content-Type")
request.setValue("Basic \(authBase64)", forHTTPHeaderField: "Authorization")
request.httpBody = httpBody
This section prepares the request body. On line 23, we create a dictionary with the data to send, then serialize it to JSON data on line 24, and finally set it to the httpBody of the request on line 30.
URLSession.shared.dataTask(with: request) {(data, response, error) inThis line defines a task using URLSession's dataTask(), which handles sending the request, receiving the response, and processing it.
The request object is passed with with. The data contains the server's response body, response contains metadata like headers and status code, and error contains the reason if the request fails.
if let error = error {
    print("Failed to get item info: \(error)")
    return;
}
If an error occurs, it is printed and execution stops here.
if let response = response as? HTTPURLResponse {
    if !(200...299).contains(response.statusCode) {
        print("Response status code does not indicate success: \(response.statusCode)")
        return
    }
}
Here we cast response to HTTPURLResponse and check the status code. If it's not in the 200 range (success), we print the status code and stop execution.
if let data = data {
    do {
        let jsonDict = try JSONSerialization.jsonObject(with: data, options: []) as? [String: Any]
        let success = jsonDict!["success"] as! Bool
        var message = jsonDict!["message"] as! String

        if(success) {
            let jsonData = try JSONSerialization.data(withJSONObject: jsonDict!["item"]!, options: .prettyPrinted)

            if let item = try? JSONDecoder().decode(Item.self, from: jsonData as Data) {
                message += "\n\n*** Item Info ***\nItem Name: \(item.itemName)\nUnit Price: \(item.unitPrice)"
            }
        }

        DispatchQueue.main.async {
           self.itemInfoTextView.text = message
        }
    } catch {
        print("Error parsing the response.")
    }
} else {
    print("Unexpected error.")
}
Here, the response data is parsed into a dictionary using JSONSerialization.jsonObject(). If success is true, we extract the item data, convert it to Data, and decode it into an Item object with JSONDecoder.
The message variable is then updated with the formatted output, and since we can't update the UI directly from a background thread, we use DispatchQueue.main.async to update the Text View on the main thread.
}.resume()Finally, we call resume() to start the task.
This completes the app as described earlier in “Description of the Test App.”
That wraps up how to make an HTTP POST request with Basic Authentication using URLSession in Swift.