How to Create and Configure a Build Scheme in Xcode
When developing a system, you may want to use different settings depending on the environment when deploying your program to QA or production.
Here, we'll explain how to create and configure Build Schemes in Xcode to manage environment-specific settings.
This assumes that Build Configurations have already been added. If not, please go back to the How to Manage Environment Settings in Xcode index and add them first.
Create and Configure a Build Scheme in Xcode
A build scheme defines which target to build, the build configuration to use, and other options.
It's best to create separate schemes for each environment so that you can select the scheme when running or archiving.
Let's set up build schemes for each environment in Xcode.
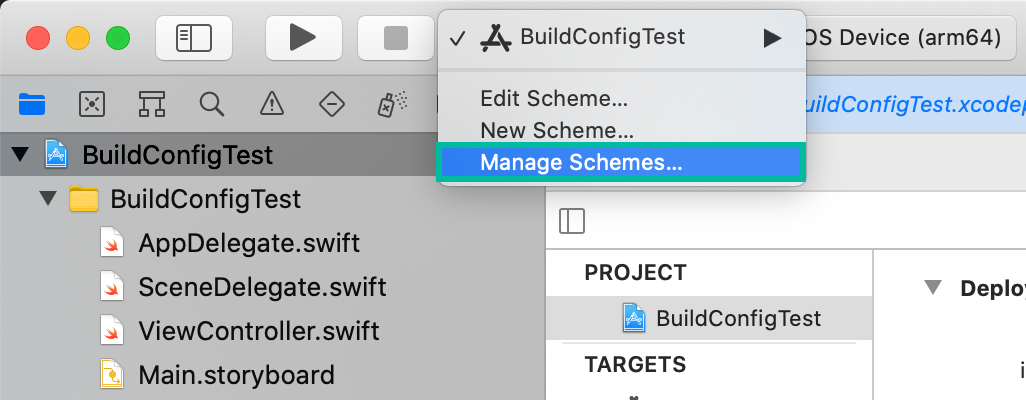
Next to the Run/Stop button, there's a scheme selector. Click it and choose [Manage Schemes...].
When you create a new project in Xcode, a default scheme with the project name is automatically generated.
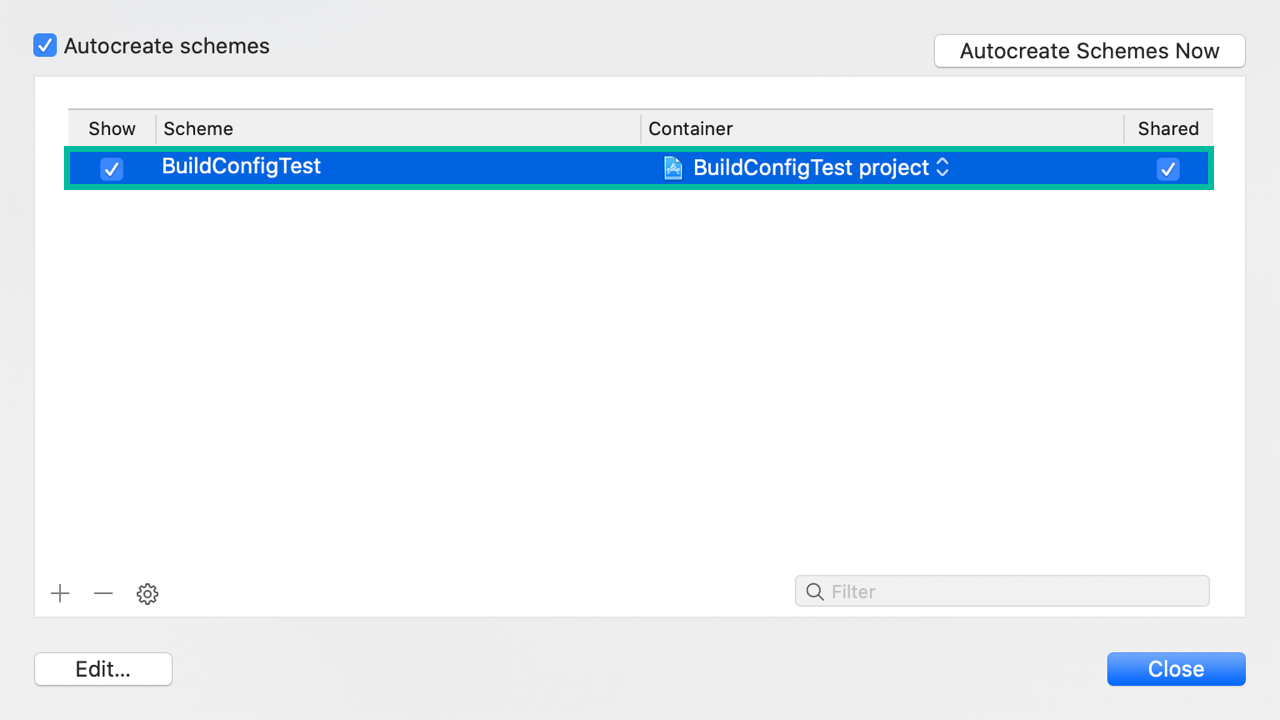
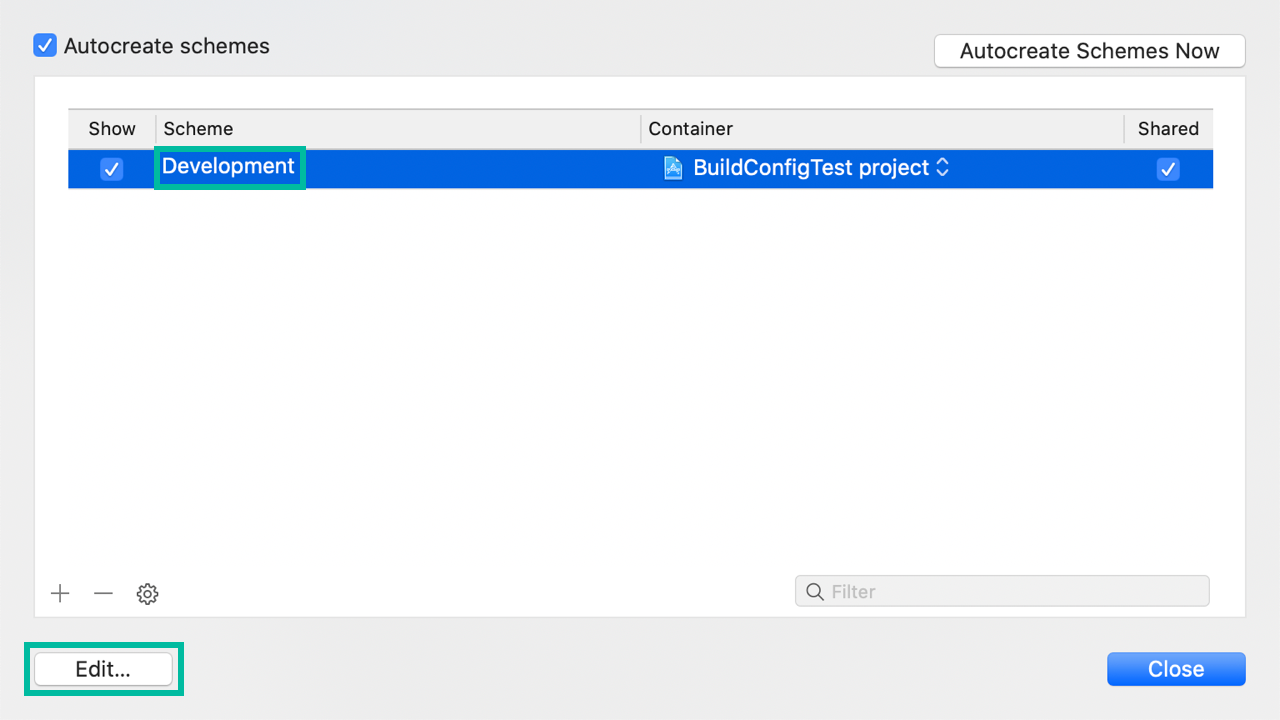
Rename this scheme to Development, select it, and then click the [Edit] button.
On the left side, select Run, Test, Profile, Analyze, and Archive in order. Each should already be configured to use Development Debug, Debug, Release, Debug, and Release configurations, respectively.

Now create similar schemes for QA and Production.
Click the [Duplicate Scheme] button and rename it to QA.
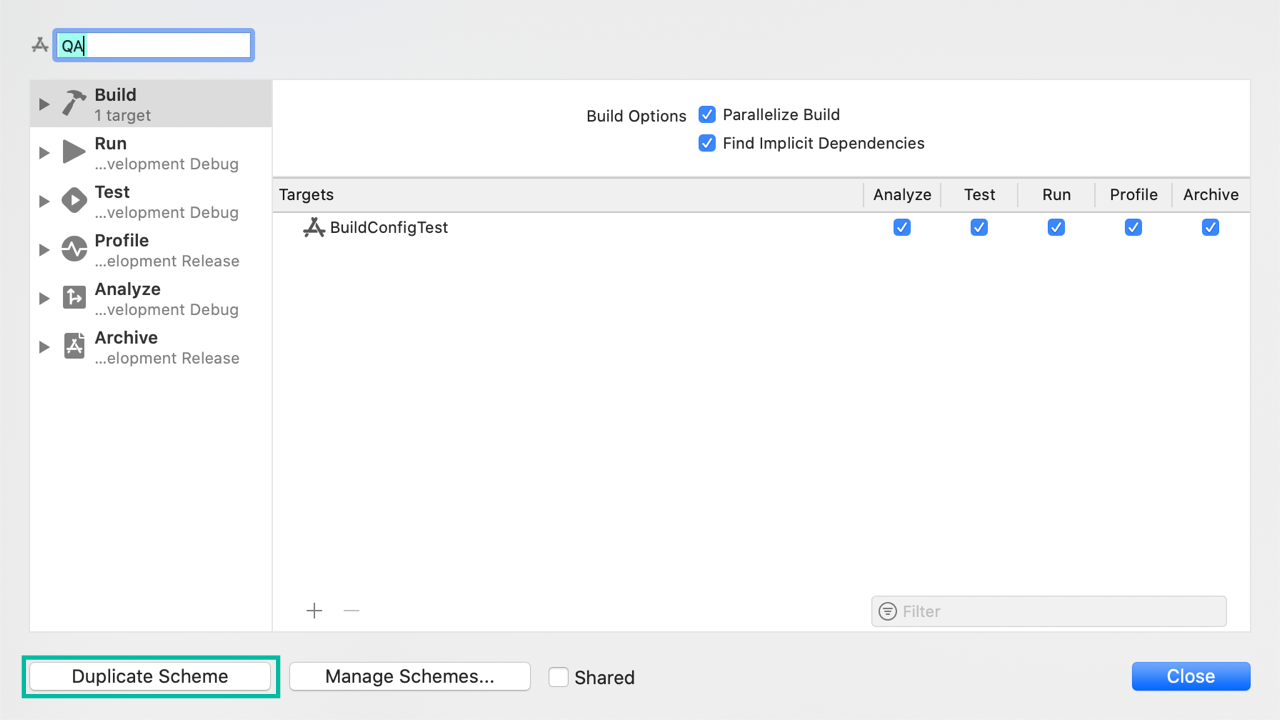
For Run, Test, Profile, Analyze, and Archive, change the Build Configurations to QA's Debug, Debug, Release, Debug, and Release.

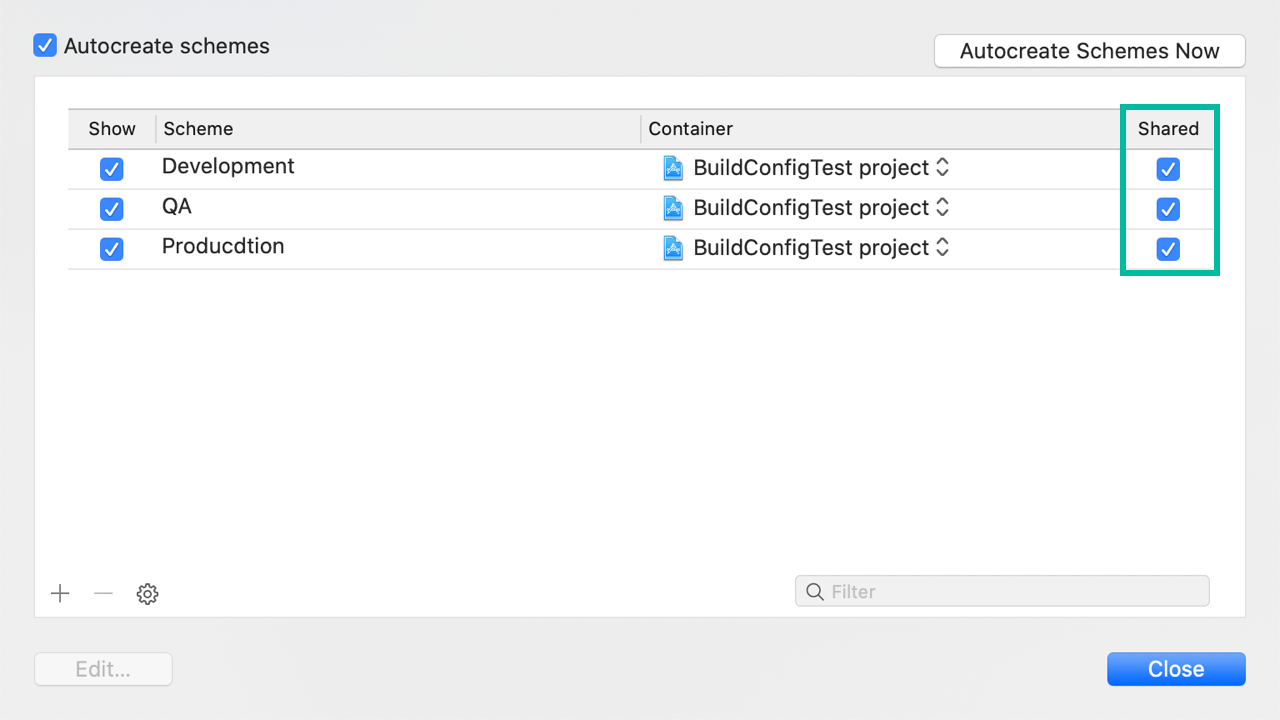
Do the same to create a Production scheme. Also, enable Share so the schemes can be used across different Xcode environments.
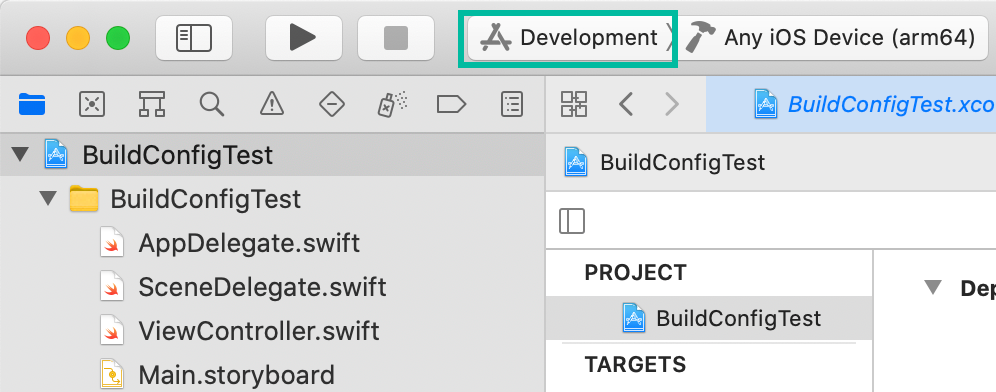
Now you have schemes for Development, QA, and Production environments.
By selecting a scheme here, the Build Configuration specified in that scheme will be applied when running or archiving.
That's how to create and configure Build Schemes in Xcode to manage environment-specific settings.